How To Assemble a Repair Kit for a Wood-Canvas Canoe
September 20, 2026
by Mike Elliott, Kettle River Canoes
email: artisan@canoeshop.ca

As I was completing the restoration of an 18′ Chestnut Prospector Vee-Stern canoe for a client, he asked me to create a wood-canvas canoe field repair kit for him. He lives in Whitehorse and plans to use the canoe on hunting trips in the Yukon. A few basic supplies along with a hammer, a screwdriver and the ubiquitous roll of duct tape are all you need to hold your canoe together until you get out of the bush and back to civilization.
The kit fits into a small food container (900 ml or 30.4 fluid ounces) and consists of the following items:
- a piece of #10 (14.5 ounce) canvas 12″x12″ (30 cm x 30 cm)
- 10′ (3 meters) of 3/16″ rawhide lacing (babiche)
- a tube of waterproof glue (Ambroid glue is no longer available but you can use a polyurethane glue — such as Gorilla Glue — instead)
- 30 – 3/4″ (19 mm) brass canoe tacks
- 20 – 3/4″ (19 mm) silicon bronze 14-gauge ring nails
- 12 – 1″ #8 silicon bronze flat-head square-drive wood screws
- a small container of alkyd enamel paint

You also need to pack a clinching iron (auto-body dolly) in order to clinch the tacks when the time comes to use them. Most of the supplies are self-explanatory except for the babiche. It is very useful for lashing a broken thwart back together or holding a make-shift thwart (tree branch) in place. Soak the babiche for about 6 hours, do your lashing and let it dry overnight. The babiche will tighten and hold anything without fail.

All of this (and much more) is described in my book – This Old Canoe: How To Restore Your Wood Canvas Canoe.
If you live in Canada, CLICK HERE to buy the book.
If you live in the USA, CLICK HERE to buy the book.
If you live in the UK, CLICK HERE to buy the book.
Si vous vivez en France, CLIQUEZ ICI pour acheter le livre.
The Keel Question in Wood-Canvas Canoes
September 13, 2026
by Mike Elliott, Kettle River Canoes
email: artisan@canoeshop.ca
If there is an area of controversy in the world of wood-canvas canoes, the question of the keel would be it.
Historically, canoes (and kayaks for that matter) never had keels. Edwin Tappen Adney documented hundreds of indigenous water craft throughout North America in the early part of the 1900’s. His meticulous notes, drawings and scale models are presented in the book “Bark Canoes and Skin Boats of North America”. It was compiled and edited by Howard Chappelle after Adney’s death. The canoes and skin boats range from small hunting boats around 11’ (3.35 meters) in length to large cargo vessels over 36’ (11 meters) long. None of these vessels had a keel.

As people of European ancestry came in contact with canoes through the 1800’s and tried to build them, they tended to approach the task of boat building from a European perspective. For them, building a boat begins with a keel. The rest of the vessel is built around it. As canoes became a commodity for the general public, canoe builders also had to appeal to a market that didn’t trust a boat unless it had a keel. Many people unfamiliar with canoes feel unstable in them and have trouble travelling in a straight line. As a result, most canoes sold in the better part of the 20th century were equipped with a keel. However, it is interesting to note that true working canoes built at the same time (such as the Chestnut Prospector, Cruiser and Ogilvy) were usually keel-free.

The Chestnut Ogilvy was designed to be stable. The wide, flat bottom allows a person to stand up in it all day long. A true working river boat, it never had a keel. Safe travel in rapid rivers requires a canoe that can side-slip easily to avoid encounters with large rocks. A keel makes this maneuver more difficult and puts the canoeist at risk.
To look at it from a design perspective, the stability of a canoe is determined by the hull shape. Wider canoes – 36” (90 cm) or more – with flat bottoms tend to have greater “initial stability”(feel more stable when you first get in them) than narrow canoes – 34” (85 cm) or less – with arched bottoms. What is gained in stability with a wide, flat bottom is lost in hull speed and vice versa (what is gained in hull speed with a narrow, arched bottom is lost in stability). Attaching a strip of wood an inch (2.5 cm) high to the bottom of a canoe does little to affect stability one way or the other.

The Chestnut Prospector was designed to dance around rocks in rapid rivers. Although it has a more rounded bottom than the Ogilvy, the tumblehome and high sides in the centre of the canoe gives it very good “secondary stability” (gets more stable as you add weight to the canoe). When the Chestnut Prospector it is tipped over on one side, it becomes stable in that position. Also, the waterline width increases as more weight is loaded into the canoe. Greater width at the water-line equals more stability.

Tracking – the tendency of a canoe to travel in a straight line – is determined by its length. The longer the waterline length, the better the canoe tracks in the water. Note here that I refer specifically to the waterline length rather than the canoe’s length overall. The hull of a Chestnut Prospector lifts dramatically at the ends. As a result, an unloaded 16’ (4.9 meters) canoe will only be about 14’ (4.2 meters) long at the waterline. What is gained in maneuverability in a shorter waterline length is lost in tracking and vice versa (what is lost in maneuverability in a longer waterline length is gained in tracking). If you are simply looking for a canoe that will travel in a straight line, get a long canoe – 17’ (5.2 meters) or more – with no rocker. If you want your canoe to be able to dodge rocks in a rapid river, choose a canoe with lots of rocker at the ends – and no keel.

Functionally speaking, most canoes are designed to navigate rivers. The rivers of northern Canada present the traveler with many challenges – chief among them; rapids filled with large rocks. The Chestnut Pal was fitted with a “shoe” keel. At 3/8″ (9 mm) high and 2¼” (57 mm) wide, it provided protection to the bottom without interfering with the canoe’s ability to sideslip past rocks in rapid rivers.
In lakes, many people complain that a canoe without a keel will be blown around by the wind. Again, it comes back to learning how to handle the canoe. When travelling on a large lake with the wind in your face, the canoe must be loaded with a majority of the weight in the forward half of the canoe. It will always tend to “weathervane” – that is, it will orient itself with the lighter end downwind. As long as the weight of the canoe is slightly upwind, the canoe will track easily into the wind.

Speaking as a canoe restorer, I wince slightly whenever I finish preparing a beautifully watertight canvas cover and then proceed to drill a dozen or more holes straight down the centerline of the canoe. I solve the watertight issue by using a top quality marine bedding compound to set the keel. Eventually, the bedding compound dries out and/or the keel is jarred by one too many encounters with rocks in rivers. When the seal is broken, the canoe begins to leak. It is difficult, if not impossible, to remove the keel without damaging the canvas. Therefore, when the canoe starts to leak, it is usually time to for a new canvas.
If the question of keels in canoes were strictly one of form and function, there would not be a discussion – a canoe is a water-craft designed to travel on rapid rivers, and as such, is better off without a keel. You only have to look at any modern Royalex or Kevlar canoe on the market. None of the canoes built today have keels. However, in the world of wood-canvas canoes, there is more to consider. Many people have grown up with their canoe. It is part of their life and part of their family. Their canoe has had a keel for fifty years, so it seems only natural that it stays that way. In this context I say, “Fair enough.” It turns out that wood-canvas canoes are more than form and function. They must be seen in the context of family history and tradition. For this reason, I have no problem re-installing a keel in a wood-canvas canoe.
All of this (and much more) is described in my book – This Old Canoe: How To Restore Your Wood Canvas Canoe.
If you live in Canada, CLICK HERE to buy the book.
If you live in the USA, CLICK HERE to buy the book.
If you live in the UK, CLICK HERE to buy the book.
Si vous vivez en France, CLIQUEZ ICI pour acheter le livre.
How To Store A Wood-Canvas Canoe
September 8, 2026
by Mike Elliott, Kettle River Canoes
email: artisan@canoeshop.ca
Proper storage of your wood-canvas canoe is essential to its long, rot-free life. The basic principles of proper storage revolve around creating an environment that is hostile to the growth of the fungi that cause wood to rot. This means keeping the canoe:
a) well off the ground
b) upside-down
c) protected from rain, snow, etc.
d) in an area with lots of air circulation
Finding a suitable place is often a major challenge. I’m sure there are as many places to store a canoe as there are canoes. Let’s look at a few.
Some examples of suitable storage spaces include:
1) Carport
2) Covered Porch
3) Unheated Garage
4) Lean-To Shelter (against a building).
Once you have identified a spot, the next step is to develop a storage method. I will describe three possible systems. From them, you ought to be able to come up with something that works for you.

1. A Basic Rack – Does your space have a solid wall on one side? Is there enough room away from the wall to allow access into the space? If so, build and install two large racks about 7’ (2 meters) apart. The example illustrated here is made from spruce 2×4’s. The joints are glued and screwed to ensure a sturdy structure. The top edges of the rack can be rounded and/or padded to protect the gunwales of the canoe. Make sure the racks are secured well to the wall (with lag-bolts or through bolts and washers).

If you are able to use the services of a steel fabricator, a canoe rack can be constructed from 1″ (25 mm) square tubing. A single weld to create a right angle is more than strong enough to support a canoe, so there is no need for extra bracing if the rack is made of steel. Protect the gunwales of your canoe by threading a length of 1½” (38 mm) ABS pipe over the steel struts.


2. A Roller System – Is your space long and narrow? Is it awkward or impossible to access the space from the side? In this case, it may be possible to feed the canoe into the space from one end. For this situation, install two support racks about 7’ (2 meters) apart. Each support rack is a length of standard 1” (25 mm) steel pipe (or square tubing) at least 40” (one meter) long threaded through a length of 1½” (38 mm) ABS pipe at least 38” (96 cm) long. Install each steel pipe securely at the desired height. The ABS pipe acts as a roller and makes it easy to store the canoe in and remove it from a confined space.

3. A Hoist System – Is it possible or desirable to get your canoe up out of the way above everything else? If so, try using a system of ropes and pulleys to hoist your canoe up and away. Support the canoe with a length of rope wrapped around each end. Tie a permanent loop in both ends of the ropes. Use a carabiner to clip the ends of each rope together to create a support loop for each end of the canoe. Then rig a length of ¼” (7 mm) braided rope (I use multi-filament polypropylene – MFP – rope) through a series of pulleys as illustrated above and install a cleat to secure the free-end of the rope.

photo by Kevin Dunn
4. Interior Design – Let’s face it, wood-canvas canoes are works of art and as such can enhance a living space. They can set a tone for the room and become a conversation piece for visitors. A little creativity can provide a method for hanging the canoe that shows off your canoe to its best advantage. This is an option as long as the space has large doors to allow the canoe to be moved into and out of the space. Narrow hallways or tight corners into the space would eliminate this as an option.

photo by Kevin Dunn
Warning: When storing your canoe (either inside or outside), resist the temptation to wrap it up in a tarp. Any moisture trapped inside the tarp or developed over extended wet periods will remain there. As mentioned earlier, this sets up perfect growing conditions for the fungi that cause wood-rot. If you want your canoe to compost, then wrap it up in a tarp. Otherwise, make sure there is plenty of air circulation around your canoe and never wrap it in a tarp.
All of this (and much more) is described in my book – This Old Canoe: How To Restore Your Wood Canvas Canoe.
If you live in Canada, CLICK HERE to buy the book.
If you live in the USA, CLICK HERE to buy the book.
If you live in the UK, CLICK HERE to buy the book.
Si vous vivez en France, CLIQUEZ ICI pour acheter le livre.
by Mike Elliott, Kettle River Canoes
email: artisan@canoeshop.ca

In my book, This Old Canoe: How To Restore Your Wood-Canvas Canoe, I describe how to weave natural cane (rattan) in Chestnut canoe seats. However, most canoe builders used their own weaving pattern for their canoe seats.

The Peterborough Canoe Company (1879 – 1961) installed hand-woven cane seats in many of their wood-canvas canoes as well as many of their all-wood canoes. The pattern they used in their all-wood canoes is similar to the six-stage “quick” pattern used by the Chestnut Canoe Company (1897 – 1978). Only the sixth stage in the pattern is different. In the Chestnut pattern, both diagonal weaving stages (fifth and sixth stages) weave under the vertical strands and over the horizontal strands. In the Peterborough pattern, the sixth stage weaves over the vertical strands and under the horizontal strands.
In my book, I describe the full process of preparing the seat frames, preparing the cane and handling the cane during the weaving process. Here I will present the basic look of each stage and give details for the sixth stage only for the Peterborough pattern.

First Stage ̶ Vertical strands

Second Stage ̶ Vertical strands arranged beside the strands of the first stage

Third Stage ̶ Horizontal strands

Fourth Stage ̶ Horizontal strands arranged beside the strands of the third stage


Fifth stage – Diagonal strand woven under the vertical strands and over the horizontal strands

Sixth stage – Begin the pattern in the empty corner on the transverse rail of the seat. Feed one end of the cane strand through the corner hole from the top-side to the under-side. Secure the strand-end in the usual manner. Secure the strand in the corner hole with a caning peg on the top-side.

Trim the working-end of the cane strand to create a sharp point. This makes weaving easier. Make sure the shiny side of the strand faces up and is not twisted. Start the weaving pattern by going under the diagonal strand next to the corner hole on the transverse rail of the seat. Then, weave over the first set of vertical strands in the pattern and under the first horizontal strands. Continue in this way (over the second set of vertical strands and under the second horizontal strands) until you reach the opposite transverse rail.

Make sure you weave under the diagonal strand on the transverse rail before threading the strand down through the hole. Pull the strand snug (but not tight) and secure the strand with a caning peg.

Continue with this pattern for each diagonal strand as you work toward the empty corner in the bottom transverse rail of the seat frame. As usual, the corner hole has two strands since it is both a hole along the transverse rail and the side rail. The strand going into the corner hole as part of the transverse rail strands weaves under the final diagonal strand before entering the hole. The second strand from the corner hole begins by weaving over the diagonal strand, then under the first set of horizontal strands and over the first set of vertical strands. Continue in the way until you reach the top transverse rail of the seat frame.
I rarely weave the Peterborough pattern. Consequently, I have to check and re-check my work constantly. I work slowly and carefully to ensure that my mistakes are made as quickly as possible.

Complete the sixth weaving stage at the corners of the seat. Make sure the strand weaves under the diagonal strand from the transverse rail and over the diagonal strand from the side rail.

Complete the seat weaving with the usual “couching” to cover the holes in the seat frame. The couching is held in place with loops of cane in every second hole around the seat frame.
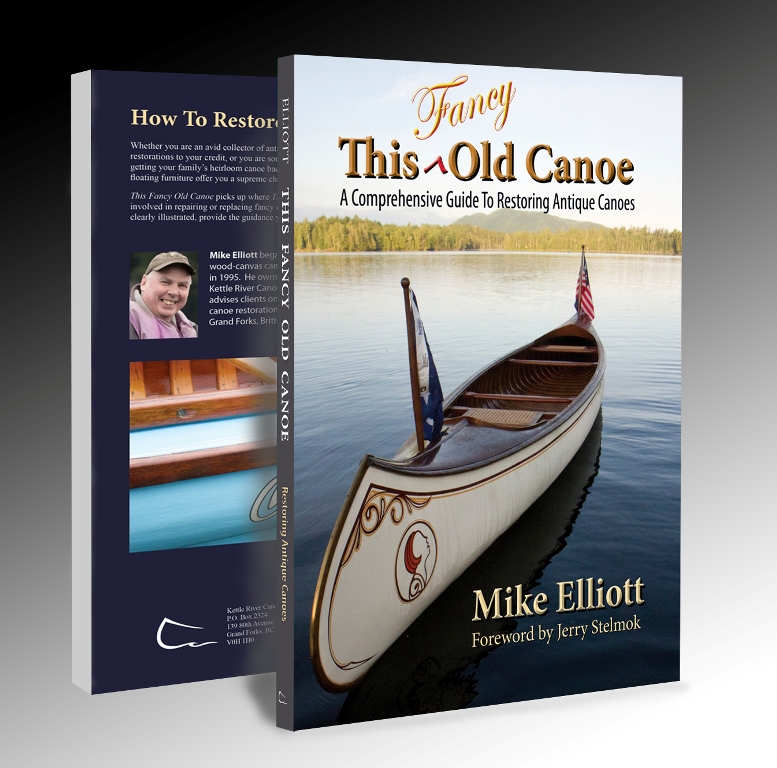
All of this (and much more) is described in my book – This Fancy Old Canoe: A Comprehensive Guide to Restoring Antique Canoes.
If you live in Canada, CLICK HERE to buy the book.
If you live in the USA, CLICK HERE to buy the book.
If you live in the UK, CLICK HERE to buy the book.
Si vous vivez en France, CLIQUEZ ICI pour acheter le livre.
by Mike Elliott, Kettle River Canoes
email: artisan@canoeshop.ca
In Canada, the canoes from the Chestnut Canoe Company set the standard by which all others are measured. Now, forty years after the company went out of business, they are still held up as classic canoe icons. So, how can you identify a canoe as a Chestnut and what makes a Prospector a Prospector?

The Chestnut Canoe Company – William and Henry Chestnut started building wood-canvas canoes in 1897. They bought a canoe in Maine (probably a Gerrish canoe) and made exact copies of it which they then sold out of their father’s furniture business in Fredericton, New Brunswick. They incorporated the canoe business in 1905 which most historians view as the birth date of the company. However, the 1972 Chestnut Canoe Company catalogue proudly celebrated 75 years in business. It seems the company viewed its birth as 1897. Be that as it may, the company grew into the largest canoe manufacturer in Canada and, at their height, were producing in excess of 3,000 canoes/year. In 1923, Chestnut Canoe Company and Peterborough Canoe Company (and later Canadian Canoe Company) amalgomated under an umbrella group called Canadian Watercraft Limited. As a result, the wood-canvas canoes for all three companies were built in Fredericton by Chestnut. The Peterborough Canoe Company ceased operations in 1961 while the Chestnut Canoe Company continued until it closed in 1978.
Chestnut produced over 50 different canoes in a wide variety of models. In this article, I will focus on the most common Chestnut canoes — Ogilvy, Cruiser, Bobs Special, Pal and Prospector.

The Chestnut Ogilvy – Although never as popular as the others, fishing guides on the salmon rivers of New Brunswick helped create a working canoe that is unmatched for its purpose. They needed a river canoe they could stand up in all day long. They were often poling the canoe upstream through shallow rapids in order to offer the prime fishing spots to their clients. The canoe had to be stable and tough with a shallow draft so as to avoid many (but not all) of the rocks. They come in six models that range in length from 16’ to 26’ – real, honest working canoes.

The 16’ model has a 36” beam and 13½” depth at the centre. The ribs are 3” wide, 3/8” thick and have only ½” space between them. This creates what amounts to a double-planked hull. The rugged nature of the Ogilvy comes with a price in terms of weight. The 16’ has an average weight of 84 pounds and a carrying capacity of 850 pounds. It has a flat-bottomed hull, straight sides, full entry lines and modest rocker in the ends. This makes for a canoe that is slow and steady – exactly what is needed when moving through shallow, rapid rivers.

The Chestnut Cruiser – This canoe was one of the first canoes that Chestnut developed. It was influenced very heavily by (if not copied directly from) Gerrish canoes built in Maine in the late 1890’s. The lines are sleek, narrow and graceful – designed to handle rivers with speed and efficiency. This narrow canoe has an arched bottom, fine-entry lines and generous rocker at the ends. Therefore, it was not for the novice paddler. However, in the hands of someone who knows what to do, this canoe is a dream to paddle.
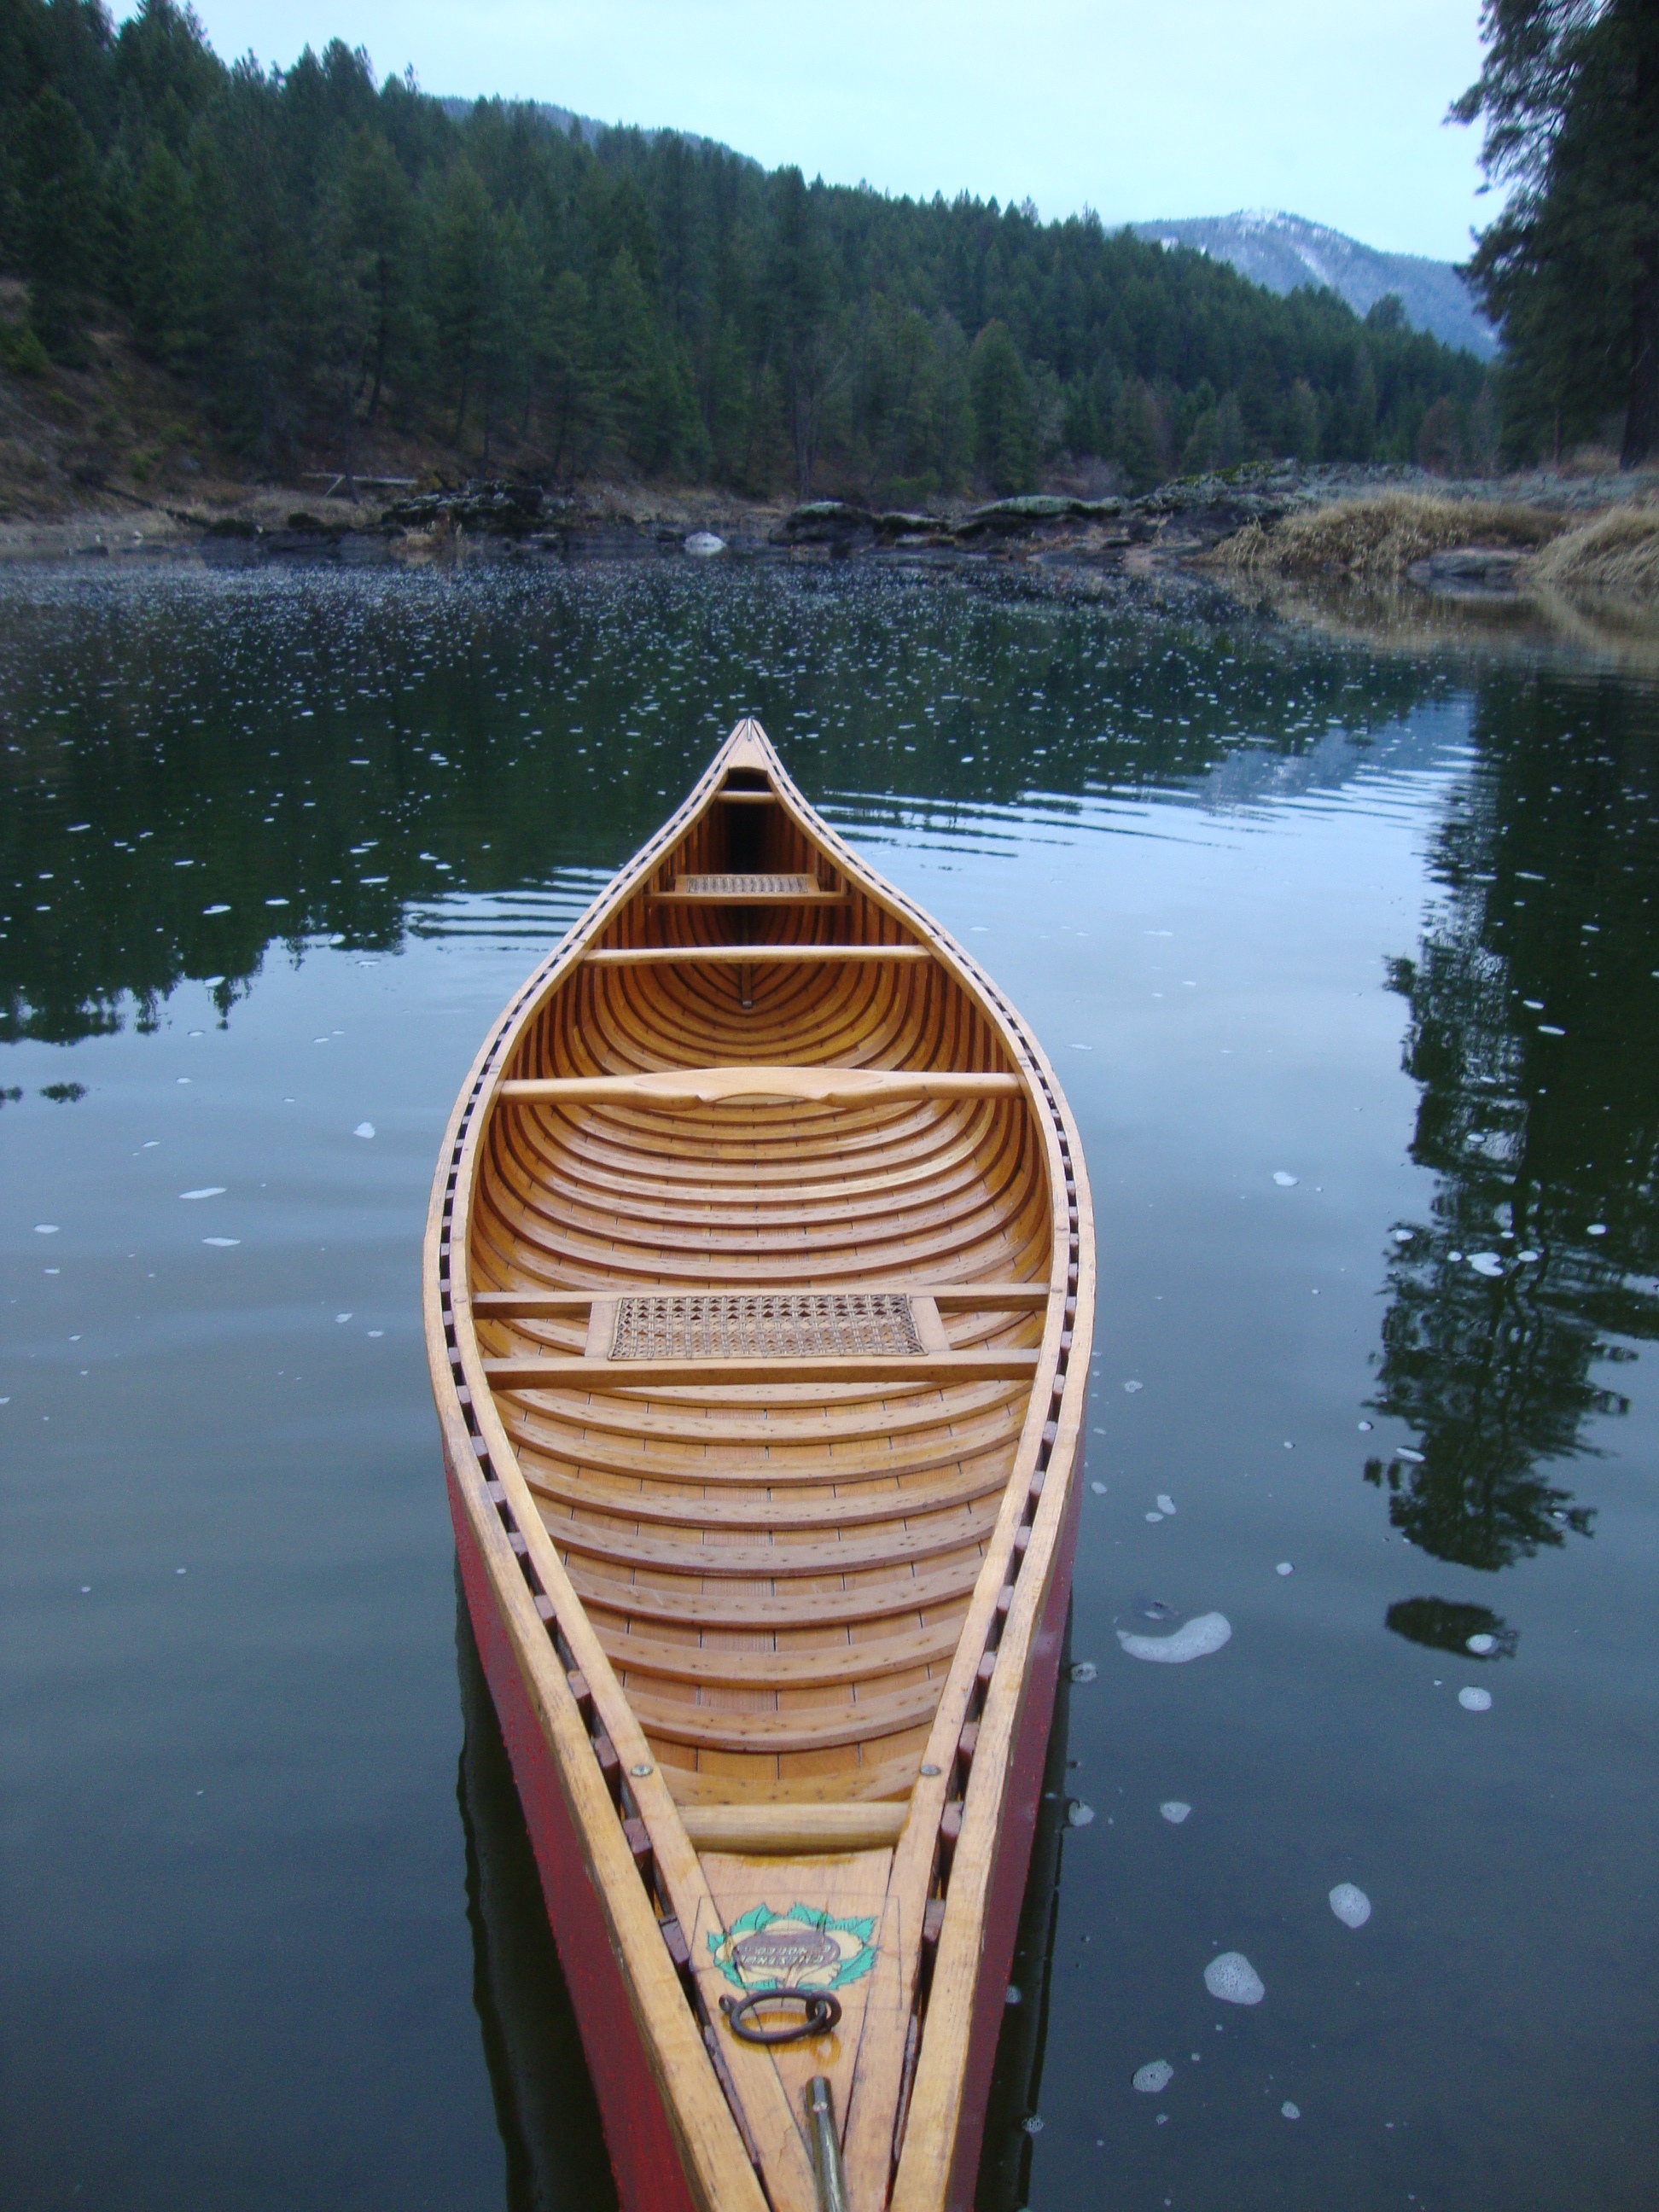
Three models are 16’ 17’ and 18’ long. The ribs are 2-3/8” wide, 3/8” thick with 2” spaces between the ribs. The 16’ model has a 34” beam, is 13” deep and weighs 70 pounds. They are also built with ribs 3” wide, 3/8” thick and ½” spaces between the ribs. These heavy-duty models are called the Guide Special. The 16’ model weighs 75 pounds. Both 16’ models have a carrying capacity of 600 pounds.

The Chestnut Bobs Special – This 15′ canoe is one of two lightweight pleasure canoes built by Chestnut. Before I talk about the canoe, I’d like to clarify the name. According to Roger MacGregor in his book “When the Chestnut was in Flower”, Henry and Will Chestnut were real history buffs. The telegraph code for the 15’ 50-Lb. Special was BOBS and made reference to Lord Roberts, a major figure during the Boer War in South Africa. Over the years, as this wide, light-weight canoe became more difficult to keep under the weight limit of 50 lbs (the average weight is 58 pounds while the carrying capacity is 700 pounds), they changed the name. I have seen a variety of Chestnut catalogues call it “Bob’s Special”, “Bob Special” and “Bobs Special”. So, feel free to take your pick.

Many outdoor enthusiasts were looking for a lightweight, stable canoe that would allow them to enjoy fly fishing or just a quiet paddle on the lake. With a 37” beam and 12½” depth at the centre, the Bobs Special is very stable — ideal for those who find a regular canoe too ‘tippy’. At the same time, it is surprisingly quick and maneuverable in the water. This is due to the shallow-arch bottom combined with moderate rocker and fine entry lines in the ends. The ribs are 2-3/8” wide and ¼” thick with 1½” spaces between them.

The Chestnut Pleasure Canoes – It is no accident that Bill Mason used a 16′ Chestnut pleasure canoe in most of his films. It is stable, yet quick; steady, yet agile. It has a 36” beam, 12¾” depth at the centre, weight of 72 pounds and a carrying capacity of 700 pounds. It is as close to being a perfect recreational canoe as you ever hope to get. It had a variety of names over the years and was one of the Chestnut pleasure canoes which also came in 14’ and 15’ lengths. Until 1958, the 16’ pleasure canoe (called the Ajax or Moonlight) had a 34” beam. Then, the mould was widened. The economy version of the 16’ pleasure canoe had been called the Pal for several years (from about 1954). The pleasure canoes came in both narrow and wide versions until about 1960 when the wider versions were adopted exclusively. Over the years, the ribs of the pleasure canoes came in two different sizes – either 1½” wide and 3/8” thick with 1½” spaces between ribs or 2-3/8” wide and 3/8” thick with 2” spaces. The 16′ was called the Pal or the Deer, the 15′ was called the Chum or the Doe and the 14′ was called the Playmate or the Fox.

The bottom has a shallow-arch hull with tumblehome extending through the entire length of the canoe. The fine entry lines and moderate rocker make it very easy to paddle. In his film, “Path of the Paddle: Solo Whitewater”, Bill Mason demonstrated very well that the Pal (or Deer) was not designed for Class 3 rapids. But, that didn’t stop him from trying. The Pal (or Deer) is a great general-purpose canoe and was the canoe of choice for many generations of canoeists – even if many of them called it a Chestnut Prospector.

The Chestnut Prospector – This is the real deal – often copied, never matched. A quick search on the internet produces at least ten modern canoe companies with a “Prospector” in its catalogue. However, the Chestnut Canoe Company invented this winning combination. With high sides, substantial arch in the bottom and lots of rocker in the full ends, it is designed to transport heavy loads quickly through rapid rivers and large, challenging lakes. It is essentially a deeper, wider Cruiser and is still regarded as the ultimate wilderness tripping canoe. Like the Cruiser, many people unfamiliar with these canoes find it a little “tippy”. The round bottom of the Prospector makes for a “shaky” feel when you first get in. However, it becomes much more stable as weigh is loaded into the canoe — making it perfect for extended trips. It also settles into a stable position when heeled over to one side. As a result, many people love it as a solo canoe.

They were made in five lengths from 14’ to 18’. The 16’ model has a 36” beam and a 14½” depth at the centre. The 16’ model weighs 76 pounds and carries 850 pounds. Although there is good tumblehome at the centre, the hull flares about 4’ from the ends in order to throw water away from the canoe while hitting big waves in rapid rivers. The ribs are 2-3/8” wide, 3/8” thick with 2” spaces between them.
All of this (and much more) is described in my book – This Old Canoe: How To Restore Your Wood Canvas Canoe.
If you live in Canada, CLICK HERE to buy the book.
If you live in the USA, CLICK HERE to buy the book.
If you live in the UK, CLICK HERE to buy the book.
Si vous vivez en France, CLIQUEZ ICI pour acheter le livre.
A Restorers’ Guide to Tremblay Wood-Canvas Canoes
August 16, 2026
by Mike Elliott, Kettle River Canoes
email: artisan@canoeshop.ca

Of the lesser known canoe manufacturers in Canada, Tremblay Canoes Limited (Les Canots Tremblay Limitée) from St. Félicien, Québec stand out from the crowd. They are well constructed with mahogany trim and their sweet lines make for a lovely paddling canoe.

The specifications I present here are for the general-purpose pleasure canoes produced by Tremblay known collectively as the Chibougamau canoes. There were six canoes in the Chibougamau line ranging in length from 14’ to 20’. As in all of my blog articles presenting specifications for canoes, I do not present the lines for the hull. I am presenting specifications for anyone faced with the restoration of a Tremblay canoe. As such, it is not a builder’s guide but rather a restorer’s guide. Most of the dimensions can be taken from existing components in the canoe.

One little note here: I am listing all of the dimensions in inches. I apologize to all of you who are working in metric. The canoes were originally built with imperial measurements, so I find it easier and more accurate to stick with the original measurements.
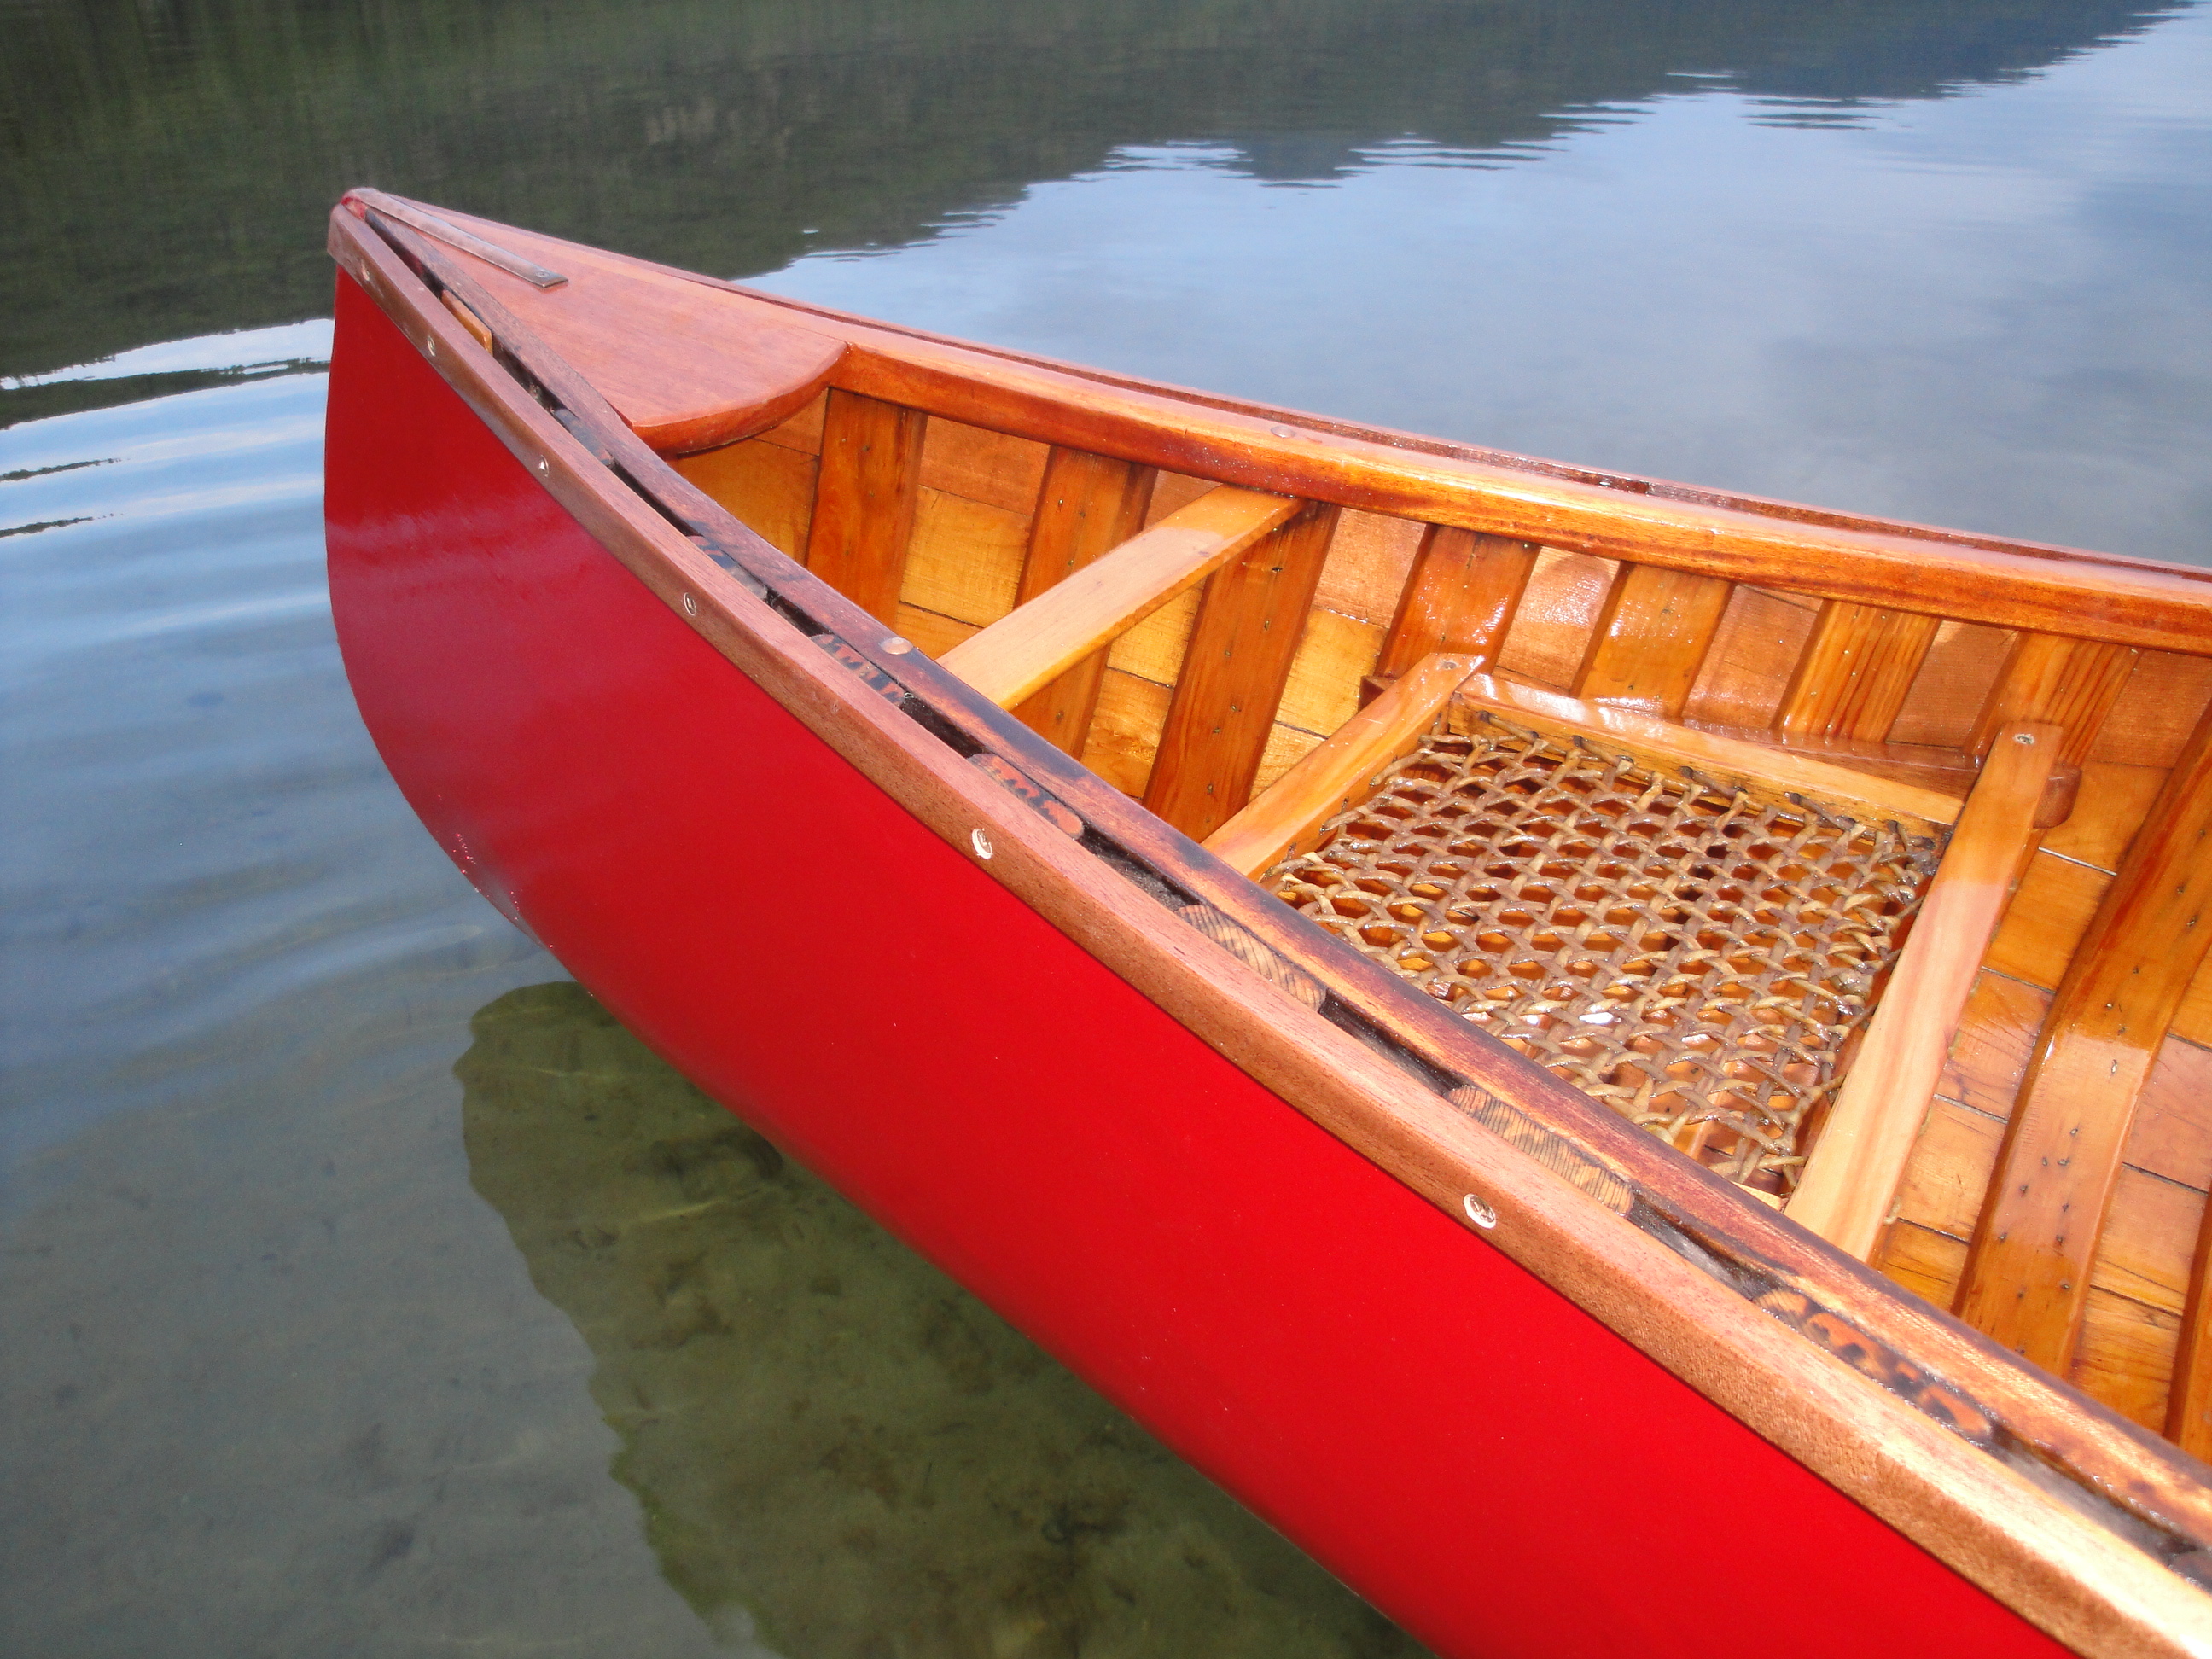
One more note: In the later years of production, Tremblay canoes were known for their use of vinyl impregnated canvas (Verolite). Although a couple of canoe builders still use this material, I have yet to find a single canoe restorer who will touch the stuff. The vinyl coating acts as a plastic bag wrapped around the canoe and effectively holds water against the hull for extended periods of time. This lack of ‘breathing’ in the canvas cover results in extensive rot through many (if not most) Tremblay canoes that were paddled on a regular basis.

Inwales – Tremblay inwales are made of mahogany with nicely rounded edges. The ends curve sharply necessitating soaking the wood and heating the wood with hot water. This facilitates the bend through that section. I have repaired inwales that were cracked through the bend originally. Mahogany is temperamental at the best of times.

Outwales – The outwales are also mahogany, but being only 7/16” wide, they do not require heat-bending. For such a thin outwale, they are surprisingly robust. The 3/8” rabbet helps keep the piece stable.

Decks – Tremblay usually made their decks from birch or maple, but I have seen mahogany used as well. They are simple in design but nicely finished.

Stem-Top – It is unlikely you will ever have to replace the entire stem. However, I rarely see an original stem-top that is not partially or completely rotted away. The top of the stem-profile is straight thereby making the repair fairly straight-forward. The end assembly is held together with a 1½” #8 bronze wood screw.

Keel – If you want to keep the keel as part of the canoe, it is a simple piece to make. Use a piece of hardwood and taper each end gradually to ½” wide. It will accept the brass (or copper) stem-band which is ½” wide.

Ribs – The ribs are simple slats 3/8” thick and 2-1/8” wide. The edges are chamfered 10° on both sides with the top cornered rounded off slightly. There are 1¾” spaces between the ribs.

Planking – Tremblay did a nice job on the planking. The boards are usually 2¾” wide and 5/32” thick.

Seats – The seat frames are made of ¾” birch or maple that is 1-1/8” wide. Both seats are attached to mahogany braces on either side of the canoe with 1½” #8 bronze wood screws. The seats are approximately 2” below the inwale. The body of the seat is laced rawhide done the same way snowshoes were laced.

Thwarts – The thwarts are made of 5/8” birch or maple that is 2” wide. They are simple pieces with no taper. They are attached directly under the inwales with steel 10-24 bronze carriage bolts.

Portage Yoke – If present in your canoe, you will appreciate the lovely shape of this yoke. It is made of ash 5¾” wide tapering to 2¼” at the ends. Like most designs that are pleasing to the eye, it is also very comfortable to use.

Hand Thwarts – These are used as carrying handles on both ends of the canoe. They are positioned about 7” back from each deck. They are made from birch or maple 3/8” thick, 1½” wide and about 13” long with nicely rounded edges.

Here is a specification sheet with most of the components on one page.
All of this (and much more) is described in my book – This Old Canoe: How To Restore Your Wood Canvas Canoe.
If you live in Canada, CLICK HERE to buy the book.
If you live in the USA, CLICK HERE to buy the book.
If you live in the UK, CLICK HERE to buy the book.
Si vous vivez en France, CLIQUEZ ICI pour acheter le livre.
How To Buy or Sell a Wood-Canvas Canoe
August 9, 2026
by Mike Elliott, Kettle River Canoes
email: artisan@canoeshop.ca
Frequently, I get an email from someone who is looking to sell their wood-canvas canoe. Typically, they tell me, “The canoe has been stored under cover for the last twenty years and is in excellent shape. What would be a reasonable price to ask for my canoe?” Conversely, a person is considering the purchase of an old canoe and wants my opinion on whether or not the asking price is a reasonable one. In both cases, the best I can do is refer them to what I see on classified ads offering other wood-canvas canoes for sale.

I guess the simplest answer is: “It is worth whatever someone is willing to pay.” I have a hard time seeing these canoes as commodities. That is why I am in the business of repairing and restoring wood-canvas canoes. My clients tend to value their canoe based on a set of criteria far removed from monetary concerns. That said, wood-canvas canoes are bought and sold. Most of them are at least thirty years old and range in condition from pristine to ‘ready for the burn pile’. So, let’s look at the market and what tends to be ‘the going rate’.

Fully restored wood-canvas canoes tend to be listed in classified ads in a range from about $3,500 to $7,000. Bear in mind that a brand new 16′ Old Town Otca canoe – made by hand on the original building form – currently sells for $6,000 – $6,700 USD (about $8,300 – $9,300 CAD). Serviceable canoes that need some work tend to be offered somewhere in the neighbourhood of $1,500 to $2,500. Canoes requiring a full restoration can be picked up for $50 to $500 (and sometimes you can get the canoe because you are willing to cart it away).
When people ask for my opinion on a specific canoe, I base my answer on what a professional canoe restoration shop would charge to bring it back to ‘like new’ condition. Almost any ‘original canoe in mint condition’ will require a new canvas. Unfortunately, the original canvas will only last about forty years (Oh, how I long for a return to the days before planned obsolescence). If the work is done by a professional canoe restorer, you are looking at spending about $2,000 to $3,000 after you have bought the canoe (all of these prices are in Canadian dollars). If the canoe ‘needs a little work’, be prepared to pay for a full restoration which could cost in the range of $3,500 to $5,500. And if it is a ‘basket-case’, the bill could far exceed what you would get for it if you ever decided to sell it (not unlike the cost of renovating an old house). So, when you see a fully restored canoe listed in a classified ad for $4,500, they are probably just trying to recoup the cost of the restoration.

About twenty years ago, I bought an original Greenwood Canoe for $900. The bulk of the woodwork was in excellent condition and the interior varnish was still in very good condition. The canvas was original (about forty years old) and although it was not rotting, it needed to be replaced. Greenwood canoes are well-known to wood-canvas canoe enthusiasts in British Columbia. Bill Greenwood built canoes in Richmond, BC from the mid 1930’s to 1975. His workmanship was unequalled not to mention all of the Philippine mahogany (lauan) used in components such as gunwales, decks and thwarts. Anyone who knows these canoes bows their head in reverence whenever they speak of Bill Greenwood and his canoes.

In my shop, I brought the canoe back to life. The original mahogany outwales were shot, so I replaced them with exact copies. I added a couple of coats of varnish to the woodwork and painted the new canvas the dark green that was typical for Greenwood canoes.

The next spring, I replaced the original slat seats with mahogany-framed hand-woven cane seats in the style of Greenwood canoes. I removed the bow-quarter thwart, installed a mahogany carrying yoke and moved the stern-quarter thwart to a position halfway between the stern seat and the centre yoke. I had no intentions of selling this canoe and, at that time, I had not seen a restored canoe sell for more than $2,500. So, when anyone asked me how much I wanted for it, I told them, “The canoe is all yours for $4,500.” In 2008, someone fell in love with my canoe and handed me a check.

Twelve years ago, I finished restoring a 16′ Chestnut Prospector for myself. I replaced the original solid-wood slat seats with hand-woven cane seats replicating the Chestnut style of cane seats. I then painted the canvas the original light green colour and installed copies of the original Chestnut deck and hull decals. These days, I rarely see a fully restored canoe selling for more than $5,000. If anyone asks me what I want for it, I will say, “$10,000 — but it’s not for sale.”
If you are selling, it is possible to get the price you are looking for. Just be prepared to wait a long time for that ‘special someone’ to come along. If you are buying, be prepared to factor in the cost of a full restoration once you have purchased the canoe.
All of this (and much more) is described in my book – This Old Canoe: How To Restore Your Wood Canvas Canoe.
If you live in Canada, CLICK HERE to buy the book.
If you live in the USA, CLICK HERE to buy the book.
If you live in the UK, CLICK HERE to buy the book.
Si vous vivez en France, CLIQUEZ ICI pour acheter le livre.
How To Photograph Wood-Canvas Canoes
August 3, 2026
by Mike Elliott, Kettle River Canoes
email: artisan@canoeshop.ca
People email regularly asking me to identify their canoe and/or give them an estimate on a restoration. When I ask them to send me some pictures via email, I often see a big difference between what people regard as a helpful image and what I require, so here is a little tutorial on the art of photographing a wood-canvas canoe.

Before taking any pictures, pull your canoe out of storage and get it into the light. Set it right side up on a pair of saw horses or on the ground. Remove anything that doesn’t belong and run a vacuum through it to remove accumulated dust.
1. A General Picture (3/4 Profile)
The first picture I ask for is a general picture in a three-quarter profile. It is a view taken from an angle to show both the inside and outside of the canoe. You are standing off to one side a couple of steps away from one end. The picture shows the decks, seats and thwarts as well as giving a good view of the hull shape. Many people send me a series of pictures of the bottom of the canoe from every conceivable angle. Other than the presence or absence of a keel, these pictures do little to help identify it or determine the condition of the canoe. For identification purposes, along with a picture like the one presented above, it is useful to let me know the overall length from tip to tip as well as the maximum width and depth in the centre of the canoe. If the canoe has a serial number (often stamped into the stern stem), that information is also useful. This canoe is 16’ long, 33” wide and 13¼” deep. I can see two caned seats, a centre thwart, a stern-quarter thwart and two hand thwarts (one at each end near the deck). From this single picture and the accompanying dimensions, I can identify this canoe as a Chestnut Cruiser (called the Kruger).


2. Both Decks (Top View)
Take a picture of each deck from directly above. Be sure to show the entire area from the tip of the canoe to the base of the deck. If a hand thwart is present (as illustrated above) include it too. These pictures help me see the condition of the various components at the ends. There is almost always some degree of rot in this area. The decal on this canoe shows it to be a Chestnut Canoe built in Oromocto, NB. The Chestnut Canoe Company was located in Fredericton, NB from 1897 to 1974. They moved to Oromocto in the mid-1970′s and stayed there until they went out of business in 1978. Therefore, this canoe was built in the period between about 1974 and 1978.


3. Both Stem-Ends (3/4 Profile)
It helps to have close-ups of the ends taken at an angle off to one side, near the end and slightly above. In some cases, as in the bow deck above, the damage is obvious. However, in most cases, it is helpful to remove a few screws from the outwales (and perhaps the stem-band) to reveal the ends more fully. In this canoe, rot in the stern-end is seen only once the interior surfaces are exposed.

4. Both Seats (Above 3/4 Profile)
Take a picture of each seat from above at an angle. Stand to one side near the centre of the canoe. This view shows the bolts and spacers as well as the seat. In this canoe, the original 3/16” carriage bolts have been replaced with 1/4″ threaded rod and nuts. The original cane is in good condition. Although it is weathered, it could be revitalized with a mixture of boiled linseed oil and turpentine followed by the usual finish of shellac to seal it followed by a number of coats of spar varnish. However, in most cases, it is best to re-cane the seats (hand-woven with natural cane — rattan).

5. Gunwales and Thwarts (Above 3/4 Profile)
The rails along each side of the canoe are called gunwales. They consist of an inside rail called the inwale and an outside rail called the outwale. Stand near the bow seat off to one side and take a picture (or two) from above to show the inwale and outwale as well as the centre thwart. In most cases, it was difficult for the builders to find full-length wood for the gunwale components. They spliced pieces together by gluing a scarf joint. Often the glue lets go and needs to be re-glued. In the final years of the Chestnut Canoe Company, they attached the ribs to the inwale with steel tacks. Over the years, they corrode causing the entire canoe to come apart. Most companies assembled their canoes completely before applying paint and varnish. As a result, the inside surface of the outwale is bare wood and the top-edge of the canvas is raw as well. If the canoe has been used at all over the years, water collects under the outwales creating a moist environment for the fungi that cause rot. Often, the canvas rots and begins to fall away from the canoe. The outwales may look fine on the outside but are often rotting from the inside out. Most canoe builders used steel carriage bolts to attach the thwarts and seats to the inwales. Again, the original carriage bolts often look fine until you try to remove them. I replace these with silicon bronze bolts as a matter of course in most restorations.

6. Obvious Damage (Above 3/4 Profile)
Please photograph any areas with obvious damage. As with most photos of the canoe, take these at an angle (to one side and slightly above). Sometimes the canoe is stored away in the back of a shed. It may be a real hassle to haul the canoe out into the daylight, but please make the effort. Good lighting is essential for these photos and taking the shots from an angle emphasizes areas of light and shadow. In this canoe, the broken rib and cracked planking are brought into clear view by the angled light.
All of the pictures are best in a fairly large format (between 500 KB and 1 MB). It is not necessary to overload an email with huge picture files. That said, tiny images are pretty much useless to me. As long as the photos are large enough to allow close examination, they will work well. Also, be sure to attach the actual files to the email rather than embedding them in the email. I need to be able to put the images in a file for my records.

In all of this, there is light at the end of the tunnel. All of the damage can be repaired and all of the rotted components can be replaced. The restored canoe will be part of the family for many generations to come.
All of this (and much more) is described in my book – This Old Canoe: How To Restore Your Wood Canvas Canoe.
If you live in Canada, CLICK HERE to buy the book.
If you live in the USA, CLICK HERE to buy the book.
If you live in the UK, CLICK HERE to buy the book.
Si vous vivez en France, CLIQUEZ ICI pour acheter le livre.
by Mike Elliott, Kettle River Canoes
email: artisan@canoeshop.ca

If the seats in your canoe are laced with rawhide similar to that in old snowshoes, chances are you own a “Huron” canoe – the generic name for canoes built in Huron Village (renamed Wendake in 1986). The “babiche” is likely to last longer than the canoe, but at some point you may need to lace the seat frames with new rawhide.

Seat frames for “Huron” canoes are constructed of birch or maple and assembled with mortise and tenon joints that are very rough and loose. No glue is used in the joinery, so the rawhide lacing is the only thing holding the frames together. As with all of the other components in a canoe, I prefer to apply finish to the frames before I lace them. The bow seat requires about 65’ (20 meters) of 3/16” (5 mm) rawhide lace while the stern seat requires about 50’ (15 meters). The lacing is usually shipped in a long tube and is as hard as a rock. It has to be soaked for several (at least 6) hours before it can be used to lace the seats. I use the bath tub at home and add a little borax to the water to help loosen the rawhide and make it easier to manipulate. It will take a few hours to lace a seat, so keep a large bowl of water nearby in order to soak the rawhide repeatedly as you work. Handling rawhide lace for several hours can be hard on the hands and the borax can really dry out your skin. Use a hand lotion both before and after lacing a seat to help avoid damage to your skin.

The lacing pattern I describe is the most common one found in canoe seats. It is by no means the only one. The process can be applied to all the other patterns. However, some are more complicated than others. The stern seat has 36 anchor points – 9 on each of the 4 frame rails. The bow seat is wider than the stern seat. Therefore, it usually has 11 anchor-points on each of the frame rails. In order to make this fit, the anchor-points on the side rails are placed very close together. This will provide enough room for one more complete repetition of the pattern.

The only tool I use is a sharp pocket knife. It trims the lacing and cuts small slits in the ends of pieces for joining. The entire pattern is laced using just a few basic knots and joins. The starting anchor join at 1.1 is made by threading the lace through a small slit in the end of the first lace in the pattern. Throughout the lacing pattern, pull the rawhide firmly but not tight. As the rawhide dries, it becomes very tight.

All of the remaining anchor points are tied using a larks-head knot. To perform this knot, you start by passing the lace over the frame. Wrap around to come up on the “outer” side of the lace and pass over the strand that was just made. Bring the lace back under the frame, then around to finally pass back over the frame and under the lace “bridge” to form the knot. In this case, a picture is worth a thousand words, so use the photo as your guide.

Anchor-points 1.2, 1.3 and 1.4 form a triangle pattern on the frame. As you go from 1.3 to create the anchor-point at 1.4, pass the strand under the horizontal. The strand then passes over the horizontal and under the diagonal “forward slash” ( / ) strand before tying off at anchor point 1.5. All subsequent weaving in the fourth strand follows this pattern.

The fifth strand of the pattern passes over the forward slash strand and under the “backslash” ( \ ) strand before tying off at anchor point 1.6. All of the subsequent weaving in the fifth strand follows this pattern.

The sixth strand weaves over the “backslash” strand and under the horizontal strand before tying off at anchor point 1.7. All of the subsequent weaving in the sixth strand follows this pattern.

The seventh strand passes over the horizontal strands and under the “forward slash” strand before tying off at anchor point 1.8. All subsequent weaving in the seventh strand follows this pattern.

The eighth strand does not have any weaving, but it finishes by passing over both the fourth and the fifth strands at the fifth anchor-point in that repetition of the pattern. It wraps under the strands and then up and over itself before forming the first anchor-point in the next repetition of the pattern.

From now on the pattern is repeated with one addition. After forming the second anchor-point in the pattern and before weaving the second strand, stabilize it by passing over both the fifth and seventh strands of the previous set, then come up and over itself. The second strand requires no weaving.

The seat is woven with progressively more and more weaving required as each set of the pattern is performed.

At some point, usually two or three times in a given seat, you come to the end of a piece of rawhide lace. To continue weaving, join the next lace to the previous one. The joins are made by cutting a small slit in each end. The end of the old strand is passed through the slit in the new strand. The entire new strand is then fed through the slit in the end of the old strand to create a secure join. I like to locate the joins so they lie on the underside of the frame.

Once you have completed the lacing pattern, the last larks-head knot is tied at the final anchor-point and the rawhide is knotted with one or two half-hitches.

Allow the rawhide to dry for a couple of days. Then apply a mixture of two parts boiled linseed oil and one part turpentine. Let the oil mixture dry for at least a week. The seat will be finished with spar varnish (thinned 12% with painter thinner/mineral spirits).
All of this (and much more) is described in my book – This Old Canoe: How To Restore Your Wood Canvas Canoe.
If you live in Canada, CLICK HERE to buy the book.
If you live in the USA, CLICK HERE to buy the book.
If you live in the UK, CLICK HERE to buy the book.
Si vous vivez en France, CLIQUEZ ICI pour acheter le livre.
by Mike Elliott, Kettle River Canoes
email: artisan@canoeshop.ca
If you are preparing to restore your wood-canvas canoe – especially in Canada – you are often looking at a canoe built by the Chestnut Canoe Company based in New Brunswick from 1897 to 1978. Of the many models produced over the years, the 16′ Pleasure Canoe was one of their best sellers. It had a variety of names and the hull shape changed as well over the course of eighty years. However, this canoe is most commonly referred to as the Chestnut Pal.

The dimensions of the components that make up the Pal are often the same as those found in many other Chestnut (and Peterborough) canoe models – including the famous Chestnut Prospector. As a result, if you have these dimensions, you can use them to restore about thirty different canoe models. So, here is a restorer’s guide to the Chestnut Pal.

This Chestnut pleasure canoe is from around 1952. The telegraph code was Ajax. It was 16′ LOA and had a 34″ beam.
The 16’ Pleasure Canoe from the Chestnut Canoe Company had a number of incarnations over the years. From the early 1900’s until 1953 it had a 34” beam, its ribs were 1.5” wide and was called the Ajax. Then the beam was widened to 36” and it was called either the Pal (1954 – 1978) or the Deer (1965 – 1978). Through the later years, the ribs were either 1.5” wide or 2-3/8” wide.

One little note here: I am listing all of the dimensions in inches. I apologize to all of you who are working in metric. The canoes were built with imperial measurements originally, so I find it easier and more accurate to stick with this measurement scale.

Inwales –The inwale is a length of ash 15/16” high. It is fashioned to fit the tumblehome present on most Chestnut canoes. Therefore, the top surface is ¾” wide while the bottom width is 7/8”. The last 15” or so at each end is tapered down to about 5/8” wide along the sides of the decks. All of the transverse components (thwarts and seats) are attached to the inwales with 10-24 (3/16”) galvanized steel carriage bolts. I replace these with 10-24 silicon-bronze carriage bolts.

Outwales – The outwales are also made of Ash. Depending on when the canoe was built, the outwales may have a chamfered edge on the bottom of the outside surface. Water often gets trapped under the outwales and results in rot on the inside surface. Therefore, I usually end up replacing this component and I make sure I seal all of the surfaces with shellac and varnish before installing the outwales. The sheer-line of Chestnut and Peterborough Pleasure Canoes turns up sharply about 18” from the end. As a result, it is necessary to soak, heat and pre-bend new inwales and outwales over custom-built forms to make the ash fit the upswept sheer-line.
It is also worth noting that both the inwales and outwales were very often made by joining two pieces together with a 9″ scarf joint to create the full length Ash required. Apparently, it was difficult to get full length Ash even in the 1960′s.

Decks – The decks were made of hardwood – usually maple, ash or oak. By the time you start restoring your canoe, the decks are often rotted along with the stem tops and inwale ends. They are attached to the inwales with six 2” #8 bronze wood screws. The deck extends about 15” into the canoe from the end.

Stem-Top – You will rarely if ever have to replace the entire stem. However, I rarely see an original stem-top that is not partially or completely rotted away. Because the top 6” or so of the stem is straight, you can usually make the repair without having to pre-bend the wood to fit the original stem-profile.

Keel – If you want to keep the shoe keel as part of the canoe, it is a simple piece to make. Use a piece of hardwood (the original was ash) and taper each end to 3/8” wide. The overall length is about 14’. It will accept the brass stem-band which is 3/8” wide.

Ribs – The Chestnut Pleasure Canoes were constructed with either the regular 2-3/8″ wide ribs or the narrow 1½” wide ribs. Both of these rib types are 3/8″ thick.

The edges of the narrow ribs are chamfered 18° on both sides with the top corners rounded off slightly. The edge of the regular rib closest to the centre of the canoe has tapered ends (11° chamfer) while the edge closest to one end of the canoe is chamfered about 30°. The chamfer angles varied over the years, so you will have to use the original ribs in your canoe as templates. There are 2” spaces between the regular ribs and 1½″ spaces between the narrow ribs.

Planking – The planking in Chestnut Canoes was made of either Eastern White Cedar or Western Red Cedar. They started out being 5/32″ thick, but were often sanded down from there. I often have to pass new planking through the thickness planer to match the thickness of the original planks.

Seats – The seat frames are made of ¾” hardwood (ash, oak or maple) 1½” wide and hand-woven cane (rattan) seats. Both seats are suspended under the inwales with 10-24 carriage bolts and held in position with 5/8” hardwood dowel. The rear stern seat dowels are 1¾” long while the front dowels are ¾” long. All of the bow seat dowels are ¾” long. Again, this varied over the years. When installing seats, I tend to use 1¾” spacers for the bow seat. The stern spacers are then 1¾” and 2¾”. This adds a noticeable degree of stability to the canoe. The forward edge of the bow seat is 58” from the bow end of the canoe while the forward edge of the stern seat is 38½” from the stern-end of the canoe.

Thwarts – The thwarts are made of ¾” hardwood (ash, oak or maple) that is 2½” wide. They taper from the centre to create hand-grips on either side that are 2” wide. They were attached directly under the inwales with galvanized steel 10-24 carriage bolts. Usually, the original carriage bolts are corroded and must be replaced. I use 2″ 10/24 silicon bronze carriage bolts. The stern-quarter thwart is positioned 67” from the stern end of the canoe while the centre thwart is positioned 96” from both ends.
All of this (and much more) is described in my book – This Old Canoe: How To Restore Your Wood Canvas Canoe.
If you live in Canada, CLICK HERE to buy the book.
If you live in the USA, CLICK HERE to buy the book.
If you live in the UK, CLICK HERE to buy the book.
Si vous vivez en France, CLIQUEZ ICI pour acheter le livre.


