by Mike Elliott, Kettle River Canoes
email: artisan@canoeshop.ca
Peter and Christ Thompson built wood-canvas canoes in Peshtigo, Wisconsin (about 50 miles north of Green Bay) as the Thompson Brothers Boat Manufacturing Company. The company built canoes from 1904 until 1962.

The specifications I present here are for the Ranger model ̶ a 16′ canoe designed for general recreational use. As in all of my blog articles presenting specifications for canoes, I do not present the lines for the hull.

That said, the hull has a shallow-arch bottom with lots of tumblehome through the full length of the canoe. The ends have very little rocker and are quite full. I am presenting specifications of component parts for anyone faced with the restoration of a Thompson Bros. canoe. As such, it is not a builder’s guide but rather a restorer’s guide. The specifications for various components changed over the years, so if possible, base your dimensions on those of the original piece from your canoe.

One little note here: I am listing all of the dimensions in inches. I apologize to all of you who are working in metric. The canoes were originally built with imperial measurements, so I find it easier and more accurate to stick with the original measurements.

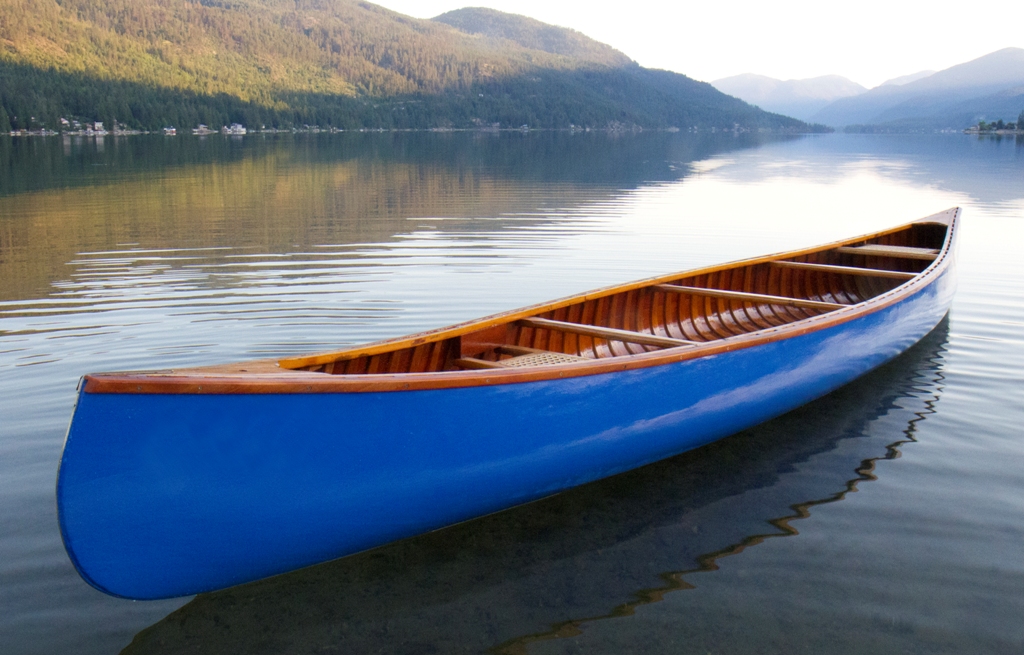
One more note: You may notice that the two canoes featured in this article do not have external stems. Although they came into the shop with external stems, the clients did not want the keel re-installed. Without a keel, the external stem is out-of-place.

Inwales – Thompson Ranger inwales are made of mahogany with chamfered edges. The ends are tapered to ½”. The sheer-line of the Ranger is flat with no rise at the ends. Therefore, the gunwales do not require any pre-bending.

Outwales – The outwales are also mahogany and are well rounded making for a comfortable and good-looking rail on the canoe.

Decks – Thompson Bros. decks were originally made of softwood (probably spruce) with a metal strap secured across the underside for extra stability. When faced with the task of replacing the decks, I chose to use maple which foregoes the need for a metal strap.

Stem-Top – It is unlikely you will ever have to replace the entire stem. However, I rarely see an original stem-top that is not partially or completely rotted away. The top of the stem-profile is straight thereby making the repair fairly straight-forward. The end assembly is held together with a 1½” #8 bronze wood screw. The external stem is attached with the same 1½” #8 bronze wood screws.

Keel – If you want to keep the keel as part of the canoe, it is a simple piece to make. Use a piece of hardwood (originally white oak) and taper each end gradually to join smoothly with the external stem. Since the external stem protects the canvas seam at the ends, there is no need for brass stem-bands.

Ribs – The ribs are 5/16” thick and 2¼” wide. The edges are chamfered 15° on both sides with the top corners rounded off slightly. The ribs are tapered to 1¼” wide at the tops. One distinctive feature of Thompson Bros. canoes is clipped corners on the rib-tops.

Planking – The planking is another distinctive feature of Thompson Bros. canoes. The boards are usually 3¾” wide, 3/16” thick and beveled to make for a very tight fit.

The planking pattern also identifies Thompson Bros. canoes. The sheer planks run straight from end-to-end. The bottom planks run up to the sheer planks and are cut to form a sharp point near the ends of the canoe.


Seats – The Ranger was built either with hand-woven cane in white oak frames or with extra thwarts placed where the front edge of the seats would normally be located. If present, the seats are woven with standard warp and weft weaving in the six-stage pattern. The bow seat is hung from the inwales with 10-24 carriage bolts and solid blocks of mahogany as spacers. The front edge of the stern seat is attached directly under the inwales while the back edge has ¾” hardwood dowels as spacers.

Thwarts – The thwarts are made of 7/8” white oak that is 2-1/8” wide. They are shaped with tapers for hand-grips and are nicely rounded but not elegant. Canoes built for use at summer camps were set up with four thwarts and no seats. Presumably, this avoided the need to repair or replace seats two or three times a season due to the inevitably heavy wear-and-tear from hundreds of kids at the camps.


Here are specification sheets with most of the components presented together for easy reference.

The entire canoe restoration process is described in my book – This Old Canoe: How To Restore Your Wood Canvas Canoe.
If you live in Canada, CLICK HERE to buy the book.
If you live in the USA, CLICK HERE to buy the book.
If you live in the UK, CLICK HERE to buy the book.
Si vous habitez en France, CLIQUEZ ICI acheter le livre.
How To Photograph Wood-Canvas Canoes
May 6, 2018
by Mike Elliott, Kettle River Canoes
email: artisan@canoeshop.ca
People email regularly asking me to identify their canoe and/or give them an estimate on a restoration. When I ask them to send me some pictures, I often see a big difference between what people regard as a helpful image and what I require, so here is a little tutorial on the art of photographing a wood-canvas canoe.

Before taking any pictures, pull your canoe out of storage and get it into the light. Pictures of your canoe hanging up in the garage are not helpful. Pictures of your canoe in the basement are equally useless.
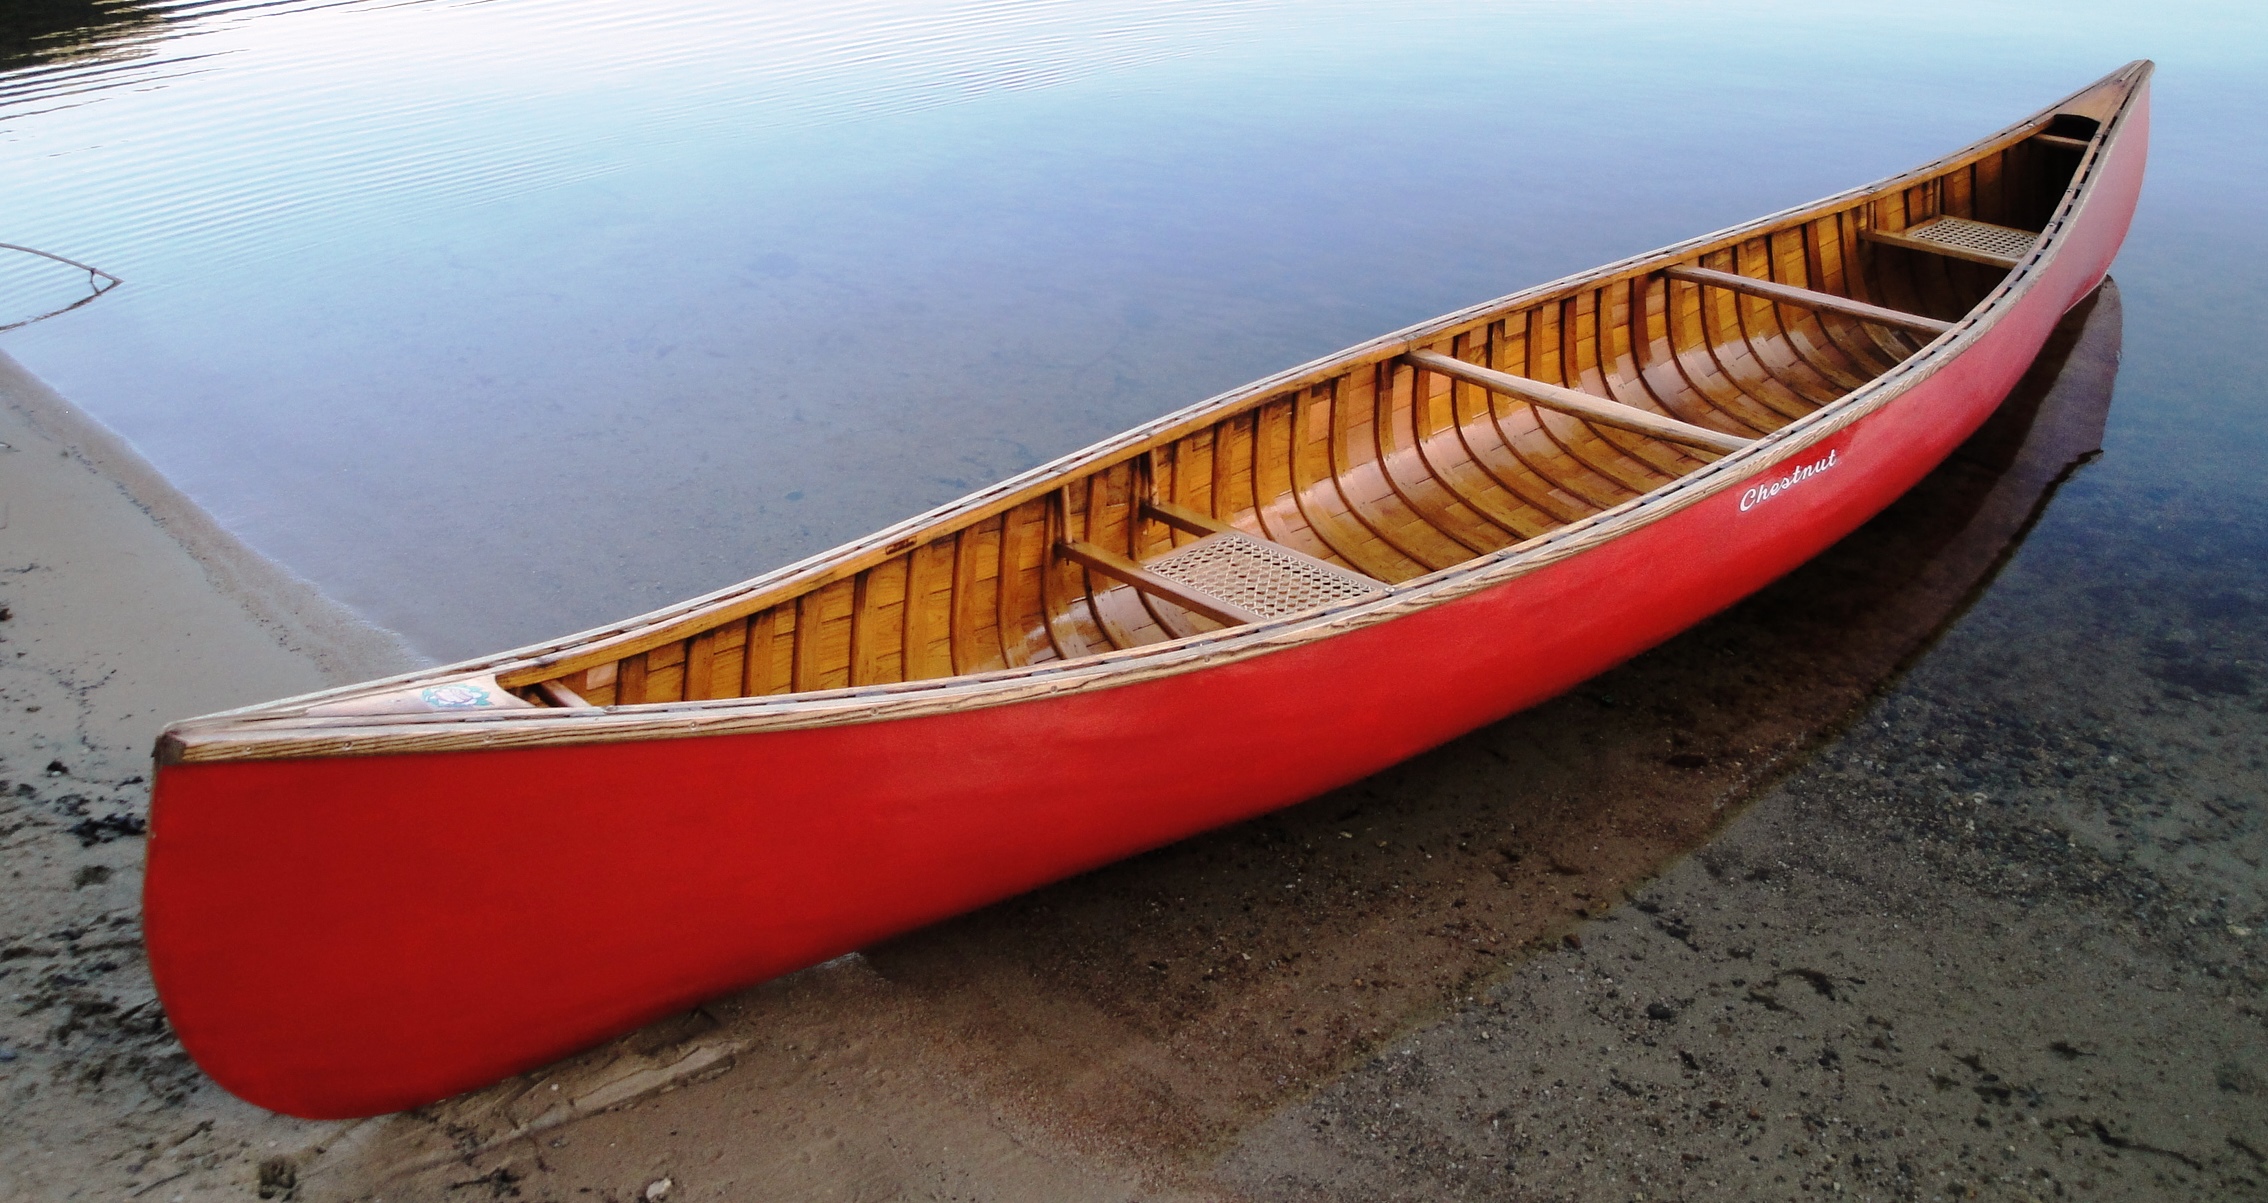
1. A General Picture (3/4 Profile)
The first picture I ask for is a general picture in a three-quarter profile. It is a view taken from an angle to show both the inside and outside of the canoe. You are standing off to one side near one end. The picture shows the decks, seats and thwarts as well as giving a good view of the hull shape. Many people send me a series of pictures of the bottom of the canoe from every conceivable angle. Other than the presence or absence of a keel, these pictures do little to help identify it or determine the condition of the canoe. For identification purposes, along with a picture like the one presented above, it is useful to let me know the overall length from tip to tip as well as the maximum width and depth in the centre of the canoe. If the canoe has a serial number (often stamped into the stern stem), that information is also useful. This canoe is 16’ long, 33” wide and 13¼” deep. I can see two caned seats, a centre thwart, a stern-quarter thwart and two hand thwarts (one at each end near the deck). From this single picture and the accompanying dimensions, I can identify this canoe as a Chestnut Cruiser (called the Kruger).


2. Both Decks (Top View)
Take a picture of each deck from directly above. Be sure to show the entire area from the tip of the canoe to the base of the deck. If a hand thwart is present (as illustrated above) include it too. These pictures help me see the condition of the various components at the ends. There is almost always some degree of rot in this area. The decal on this canoe shows it to be a Chestnut Canoe built in Oromocto, NB. The Chestnut Canoe Company was located in Fredericton, NB from 1897 to 1974. They moved to Oromocto in the mid-1970′s and stayed there until they went out of business in 1978. Therefore, this canoe was built in the period between about 1974 and 1978.


3. Both Stem-Ends (3/4 Profile)
It helps to have close-ups of the ends taken at an angle off to one side, near the end and slightly above. In some cases, as in the bow deck above, the damage is obvious. However, in most cases, it is helpful to remove a few screws from the outwales (and perhaps the stem-band) to reveal the ends more fully. In this canoe, rot in the stern-end is seen only once the interior surfaces are exposed.

4. Both Seats (Above 3/4 Profile)
Take a picture of each seat from above at an angle. Stand to one side near the centre of the canoe. This view shows the bolts and spacers as well as the seat. In this canoe, the original 3/16” carriage bolts have been replaced with 1/4″ threaded rod and nuts. The original cane is in good condition. Although it is weathered, it could be revitalized with a mixture of boiled linseed oil and turpentine followed by the usual finish of shellac to seal it followed by a number of coats of spar varnish. However, in most cases, it is best to re-cane the seats (hand-woven with natural cane — rattan).

5. Gunwales and Thwarts (Above 3/4 Profile)
The rails along each side of the canoe are called gunwales. They consist of an inside rail called the inwale and an outside rail called the outwale. Stand near the bow seat off to one side and take a picture (or two) from above to show the inwale and outwale as well as the centre thwart. In most cases, it was difficult for the builders to find full-length wood for the gunwale components. They spliced pieces together by gluing a scarf joint. Often the glue lets go and needs to be re-glued. In the final years of the Chestnut Canoe Company, they attached the ribs to the inwale with steel tacks. Over the years, they corrode causing the entire canoe to come apart. Most companies assembled their canoes completely before applying paint and varnish. As a result, the inside surface of the outwale is bare wood and the top-edge of the canvas is raw as well. If the canoe has been used at all over the years, water collects under the outwales creating a moist environment for the fungi that cause rot. Often, the canvas rots and begins to fall away from the canoe. The outwales may look fine on the outside but are often rotting from the inside out. Most canoe builders used steel carriage bolts to attach the thwarts and seats to the inwales. Again, the original carriage bolts often look fine until you try to remove them. I replace these with silicon bronze bolts as a matter of course in most restorations.

6. Obvious Damage (Above 3/4 Profile)
Please photograph any areas with obvious damage. As with most photos of the canoe, take these at an angle (to one side and slightly above). Sometimes the canoe is stored away in the back of a shed. It may be a real hassle to haul the canoe out into the daylight, but please make the effort. Good lighting is essential for these photos and taking the shots from an angle emphasizes areas of light and shadow. In this canoe, the broken rib and cracked planking are brought into clear view by the angled light.
All of the pictures are best in a fairly large format (between 500 KB and 1 MB). It is not necessary to overload an email with huge picture files. That said, tiny images are pretty much useless to me. As long as the photos are large enough to allow close examination, they will work well. Also, be sure to attach the actual files to the email rather than embedding them in the email. I need to be able to put the images in a file for my records.
In all of this, there is light at the end of the tunnel. All of the damage can be repaired and all of the rotted components can be replaced. The restored canoe will be part of the family for many decades to come.
The entire canoe restoration process is described in my book – This Old Canoe: How To Restore Your Wood Canvas Canoe.
If you live in Canada, CLICK HERE to buy the book.
If you live in the USA, CLICK HERE to buy the book.
If you live in the UK, CLICK HERE to buy the book.
Si vous habitez en France, CLIQUEZ ICI acheter le livre.

