How to Repair a Rib-and-Batten Canoe — Part 2
April 29, 2019
by Sam Browning
edited by Mike Elliott, Kettle River Canoes
email: artisan@canoeshop.ca
Note: In 2016, I put out a call for someone with a wide-board raised-batten canoe to bring it to my shop in British Columbia, Canada for me to restore and document as part of my second book ̶ “This Fancy Old Canoe”.

I was contacted immediately by Sam Browning. He was about to start restoring one of these canoes. He offered to take pictures of the project as he worked. I offered to come to his shop to see the canoe and meet him in person until he let me know he lived in Ely, Cambridgeshire, England.
A few months later, I received a USB flash drive in the mail from Sam. It contained 300 images and a copy of the posts he presented on the ‘Song of the Paddle’ web forum as he documented the restoration. For my blog (and eventually my book), I have edited Sam’s posts and added a few notes of my own (presented in italics). For this article, I am presenting the wide-board repairs.
Many thanks to Sam for his excellent work and generous contribution to my book.
*****************

My plank repairs consist of three boards that need to be replaced. There is a small piece missing from the bilge-plank at the stern. It starts at the last rib and runs to the internal stem. The second is a bilge-plank on the port side spanning across six ribs and the third is a long bilge-plank on the starboard side spanning across 17 ribs. My plan is to do the repairs in order from smallest to largest in order to learn on the small repairs and hone the process for the Big One.

Copper canoe nails (16-gauge 1″ or 25 mm long) are harder to get out than tacks on a cedar-canvas canoe as they are driven through a basswood (or Spanish cedar) plank as well as rock elm ribs before being bent over (dubbed) and clinched. The nails aren’t tapered either (apart from the point) and they hold well despite their age.

Getting rid of the heads and punching them through to the inside works best. I use an angle grinder set up with a 24-grit sanding disk to grind off the heads of the copper nails. Care must be taken to ensure that only the board to be removed is touched by the grinder.

For the first repair, I tidy up where the new piece of plank has to start, removing nails and chamfering the edge so that the new nails will go through both the new and existing wood.

The new plank is a piece of basswood cut carefully to its final dimensions and planed to match the thickness of the original boards (¼” or 6 mm). The end of the new plank butts up again the existing board and laps over it with a chamfered edge to match the chamfer on the existing board.

When I am happy with the fit, I drill pilot holes for the canoe nails at the join and push them through from the outside.

Next, whilst pushing them firmly from the outside, I bend (dub) the nails over with a clinching iron.

I wet the outside of the new plank with hot water so the nails sink into the wood without doing any damage.

Then, while holding a clinching iron on the bent nail inside, I hammer the outside until the nail is flush with the surface.

I repeat this along the top and bottom edge as well as two rows of nails in the stem. The end of the new plank extending past the stem is trimmed to complete the job.
I now turn my attention to the second plank repair. Because of what I’ve done already, I’m confident about the nailing procedure. For this repair, I have to learn to fit a plank that bends in two directions. In the factory, the planks would have been cut from patterns which (sadly) are not available to me. When the flat shape had been cut, the outside of the plank was soaked with boiling water poured over it. This swells the grain causing it to cup until the correct curve was reached. Then, it was nailed into place. My plan for the repair is to cut the plank oversize, hold it in place with a strap at each rib, then pour boiling water over it to cause it to curve. As it bends, I should be able to tighten the straps and hold it in place until it dries. I will then mark out the dimensions of the gap and work from there.

The first step is to fit basswood strips onto the outside surface of the exposed ribs. These spacers create a flush surface upon which to bent the oversized plank. To make spacers, I cut strips and poured boiling water over them. They bend into a suitable curve with very little pressure. I then tape the spacers into place.

I chamfer the edges of the old plank so the chamfer on the new plank fits precisely and allows a line of nails to go through both.

To spread the tension from the straps evenly along the new plank, I put battens along the both the top and bottom edges.

I use steam from a wallpaper stripper rather than pouring boiling water to help the plank curve into shape.

Two people would have made things easier, but after holding the steamer in place for a minute or so, then moving it along the plank and holding it with my knee, I am able to pull the straps progressively tighter. I work my way up and down the plank until it is tight against the hull along its full length. At both ends, I use ratchet straps and a couple of wedges to hold the curve tight to the hull. I allow the plank to dry for a couple of days.

Before I remove the straps, I clamp some blocks under the plank and at the ends. These act as reference points so I can put the plank back in exactly the same place while I mark, trim and fit the top edge.

A planking gauge is used to mark the position of the gap’s edge even though the plank covers it and I can’t see.

The ‘L’ part of the gauge slides behind the plank and is moved along the edge of the gap while a pencil sits in the notch and draws a line.

Once the plank is marked, I use an apron plane to bring the plank dimension down to just outside the line. Then, a series of testing fitting, shaping, fitting, shaping until I have it just right. Then, the inside edges at the ends were chamfered to match the existing planks. The whole process takes about two hours before I am happy with it. I run a line of masking tape above and below the gap. On the tape, I mark where the ribs are so I can drill from the outside and place straps and blocks just to the sides of the ribs. This way, I can get the nails in, dubbed and clinched without worrying about the straps being in the way.

I nail the ribs, five in each, with a double row on the ends, then along the top and bottom edges into the battens – about 90 nails in all, drilled, pushed through, dubbed and clinched.

With the process honed, I turn to the Big One. I begin by making 16 basswood spacers for the ribs.

I steam and tape the spacers to the ribs.

I make two 12′ (3.7 meter) battens, arrange 16 straps and two ratchet straps. I make an oversized piece of basswood to fit over the gap. I steam the plank and tighten the straps, then steam and tighten again.

I check to make sure it is all tight with no gaps showing, then leave it for a couple of days.

The marking, cutting, fitting, shaping routine is the same as for the second plank.

The final fitting and nailing proceeds smoothly.

It’s great how once you have done a job, you wonder what all the fuss was about. I suppose, at any time, I could have pulled a strap too tight and split a plank. I could have planed too much off and left a gap. A plank could have split while I was nailing. If you need a plank for your board and batten canoe just let me know, I have a spare plank waiting in reserve.

The entire restoration process (including plank replacement) is described in my book – This Old Canoe: How To Restore Your Wood Canvas Canoe.
If you live in Canada, CLICK HERE to buy the book.
If you live in the USA, CLICK HERE to buy the book.
If you live in the UK, CLICK HERE to buy the book.
Si vous habitez en France, CLIQUEZ ICI acheter le livre.
If you have read the book, please post a review on Amazon, Goodreads and/or any other review site.
How to Repair a Rib-and-Batten Canoe — Part 1
April 29, 2019
by Sam Browning
edited by Mike Elliott, Kettle River Canoes
email: artisan@canoeshop.ca
Note: In 2016, I put out a call for someone with a wide-board raised-batten canoe to bring it to my shop in British Columbia, Canada for me to restore and document as part of my second book ̶ “This Fancy Old Canoe”.
(photo by Nick Dennis)
I was contacted immediately by Sam Browning. He was about to start restoring one of these canoes. He offered to take pictures of the project as he worked. I offered to come to his shop to see the canoe and meet him in person until he let me know he lived in Ely, Cambridgeshire, England.
A few months later, I received a USB flash drive in the mail from Sam. It contained 300 images and a copy of the posts he presented on the ‘Song of the Paddle’ web forum as he documented the restoration. For my blog (and eventually my book), I have edited Sam’s posts and added a few notes of my own (presented in italics). For this article, I am presenting the rib repairs as well as some general history and description of the canoe.
Many thanks to Sam for his excellent work and generous contribution to my book.
*****************

(Canadian Canoe Company catalogue, 1929)
My canoe was made by the Canadian Canoe Company in Peterborough, Ontario. The company started in 1892. The last canoes of this type were built around the mid 1930’s. From the 1929 catalogue, my canoe is the 15′ 6″ No. 4 all wood canoe F quality (varnished, basswood boards). It has a 29½” (75 cm) beam and a depth of 11½” (29 cm) amidships. It is interesting to note that the garboards (the two planks on the bottom of the canoe) in my canoe are Spanish cedar ̶ a true mahogany.

(photo by Sam Browning)
This particular canoe was imported to England by Salter Bros. Ltd. of Oxford. Looking at the Salter Bros. history, they mention importing 21 canoes from Canada in 1930. My canoe may be one of those.

(illustration by Sam Browning)
The exact origin of wide-board raised-batten canoe construction on a solid wood form is up for debate, but it was probably developed in a combined effort by Tom Gordon and John Stephenson in 1857. Construction began by laying down a white oak keelson. Rock elm ribs were then bent over the form and fitted into notches cut into the keelson. Wide basswood boards (three or four on each side) ran longitudinally and were attached to the ribs with copper canoe nails. Nail holes were pre-drilled and the nails were driven straight into the solid-wood form. The hull was then pulled free of the form and turned right-side up.

(photo by Sam Browning)
The nails were then ‘dubbed’ (bent over) to lie flat along the ribs (with the points towards the keelson) and then clinched tight with a clinching iron and cobblers hammer. The seams between the basswood boards were covered with ironwood battens between the ribs held in place with copper canoe nails.
If this was a cedar-canvas canoe with damaged ribs, I’d just take them out and replace them. With one of these canoes, you can’t do that without taking the whole thing apart. What I plan to do is bend new rib material which will extend from the keelson to the sheer-line and nail it in place alongside the existing rib (this process is commonly used in wooden boat repair and is known as sistering ribs).

(photo by Sam Browning)
Because the canoe has had broken ribs for many years, it needs a bit of reshaping before I can bend and install the new rib material. Straps around the canoe with a couple of lengths of timber to push in the right places helps to reshape.

(photo by Sam Browning)
I bend the new rib material inside (straight-grained english oak cut to size and shaped to replicate the original before it is soaked overnight and steamed for an hour), on top of the old rib. Any spring-back should result in the right size and curve. The end of the new rib at the keelson is held in place by a scrap piece of hardwood wedged between it and a length of timber positioned above the keelson and clamped on top of the thwarts. The rest of the new rib is held in place with g-clamps (c-clamps) and spring clamps. This process is facilitated by the fact that one of the basswood planks is missing. The missing plank allows me to use a couple of spring clamps to hold it in the middle.

(photo by Sam Browning)
Once the new rib has dried overnight, I decided to cut the battens first as it has to be easier than removing them and installing new ones. With over ten copper nails dubbed and clinched in each batten, it would be impossible to remove them in one piece, and they do have to fit exactly. I cut the battens with an inlay saw (3″ or 76 mm blade with 20 teeth per inch and a 0.011″ or 0.3 mm kerf). Its curved blade allows me to remove a small piece of the batten with less chance of damaging the planks.

(photo by Sam Browning)
The battens are carefully marked and cut. I have to make sure the plank is clean where the new rib will go. I clamp the rib in position making sure it fits well against the keelson and the original rib.

(photo by Sam Browning)
When the new rib is in place, I drill a pilot hole through the rib and plank at the centre of each rib. Then, I push a 19 mm (¾”) copper canoe nail in from the outside. The nail is then dubbed towards the keelson and clinched tight. Then, I pilot, dub and clinch three more nails into each plank as well as one at each batten. I cut the rib flush with the sheer-line and shape the rib-top to match the existing ribs.

(photo by Sam Browning)
At the gap, where the broken rib is exposed, I cut it off in line with the battens.

(photo by Sam Browning)
In some sections, retention of the original hull shape was facilitated by clamping a hardwood batten on the outside of the exposed original ribs.

(photo by Sam Browning)
The broken sections of original rib were cut away with the inlay saw as well as the sections of batten required to allow for positioning of the new rib which was then soaked, steamed and clamped in place.

(photo by Sam Browning)
A total of twelve broken ribs were sistered in this canoe. The ribs were repaired in stages, doing every second rib along the length of the canoe in order to maintain the shape of the hull as much as possible.
The entire restoration process (including rib repairs and replacement) is described in my book – This Old Canoe: How To Restore Your Wood Canvas Canoe.
If you live in Canada, CLICK HERE to buy the book.
If you live in the USA, CLICK HERE to buy the book.
If you live in the UK, CLICK HERE to buy the book.
Si vous habitez en France, CLIQUEZ ICI acheter le livre.
If you have read the book, please post a review on Amazon, Goodreads and/or any other review site.
by Mike Elliott, Kettle River Canoes
email: artisan@canoeshop.ca

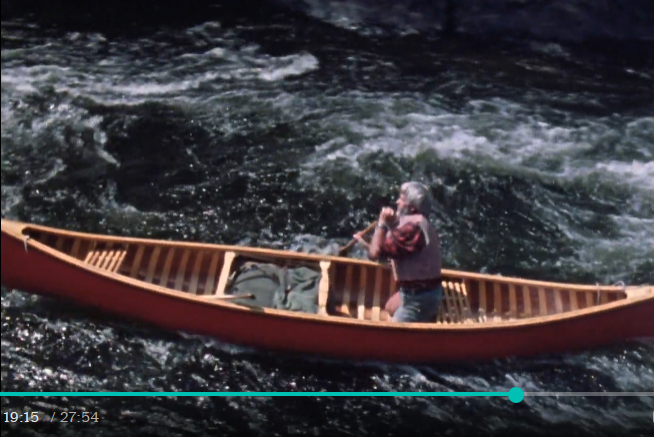
The National Film Board of Canada (NFB) website is a treasure trove of beautiful short films. Among my personal list of favourites is the Path of the Paddle series by Bill Mason. Of the four films in the series, Path of the Paddle Solo Whitewater (1977) is the one I tend to watch over and over again. Not only is the photography outstanding, I get a thrill every time I see a wood-canvas canoe being jockeyed through 3′ (one meter) standing waves in a wild river.

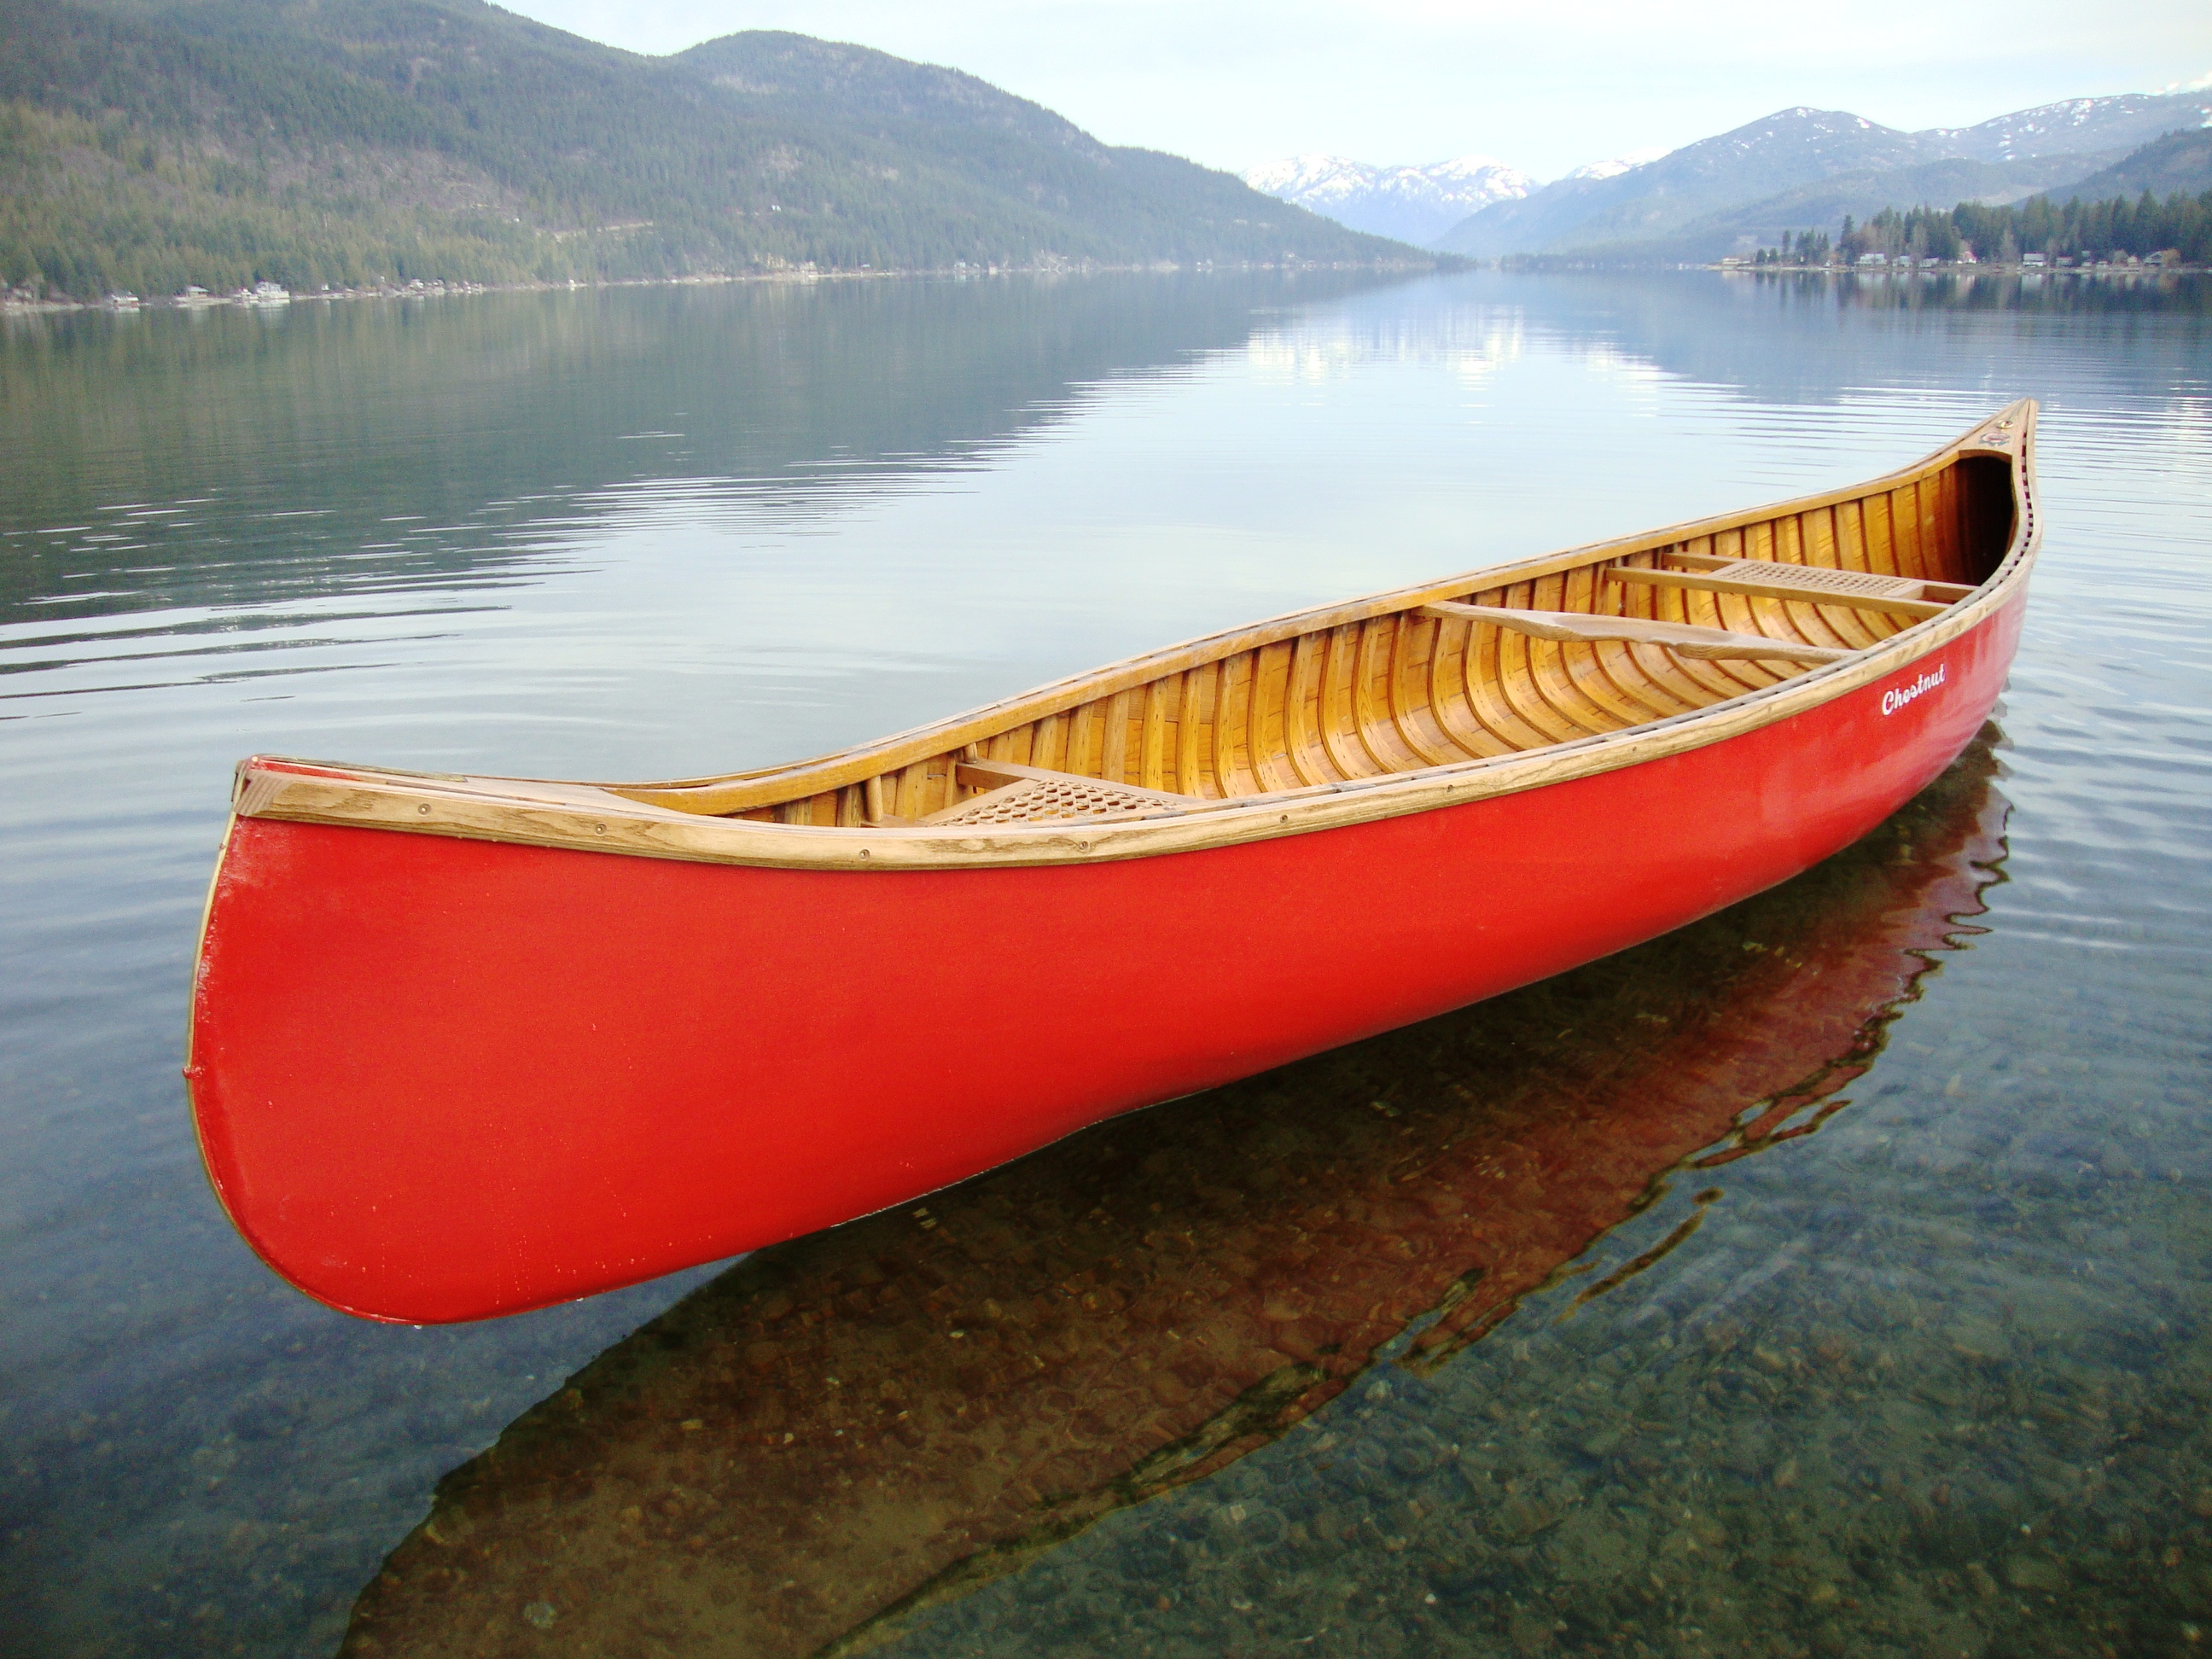
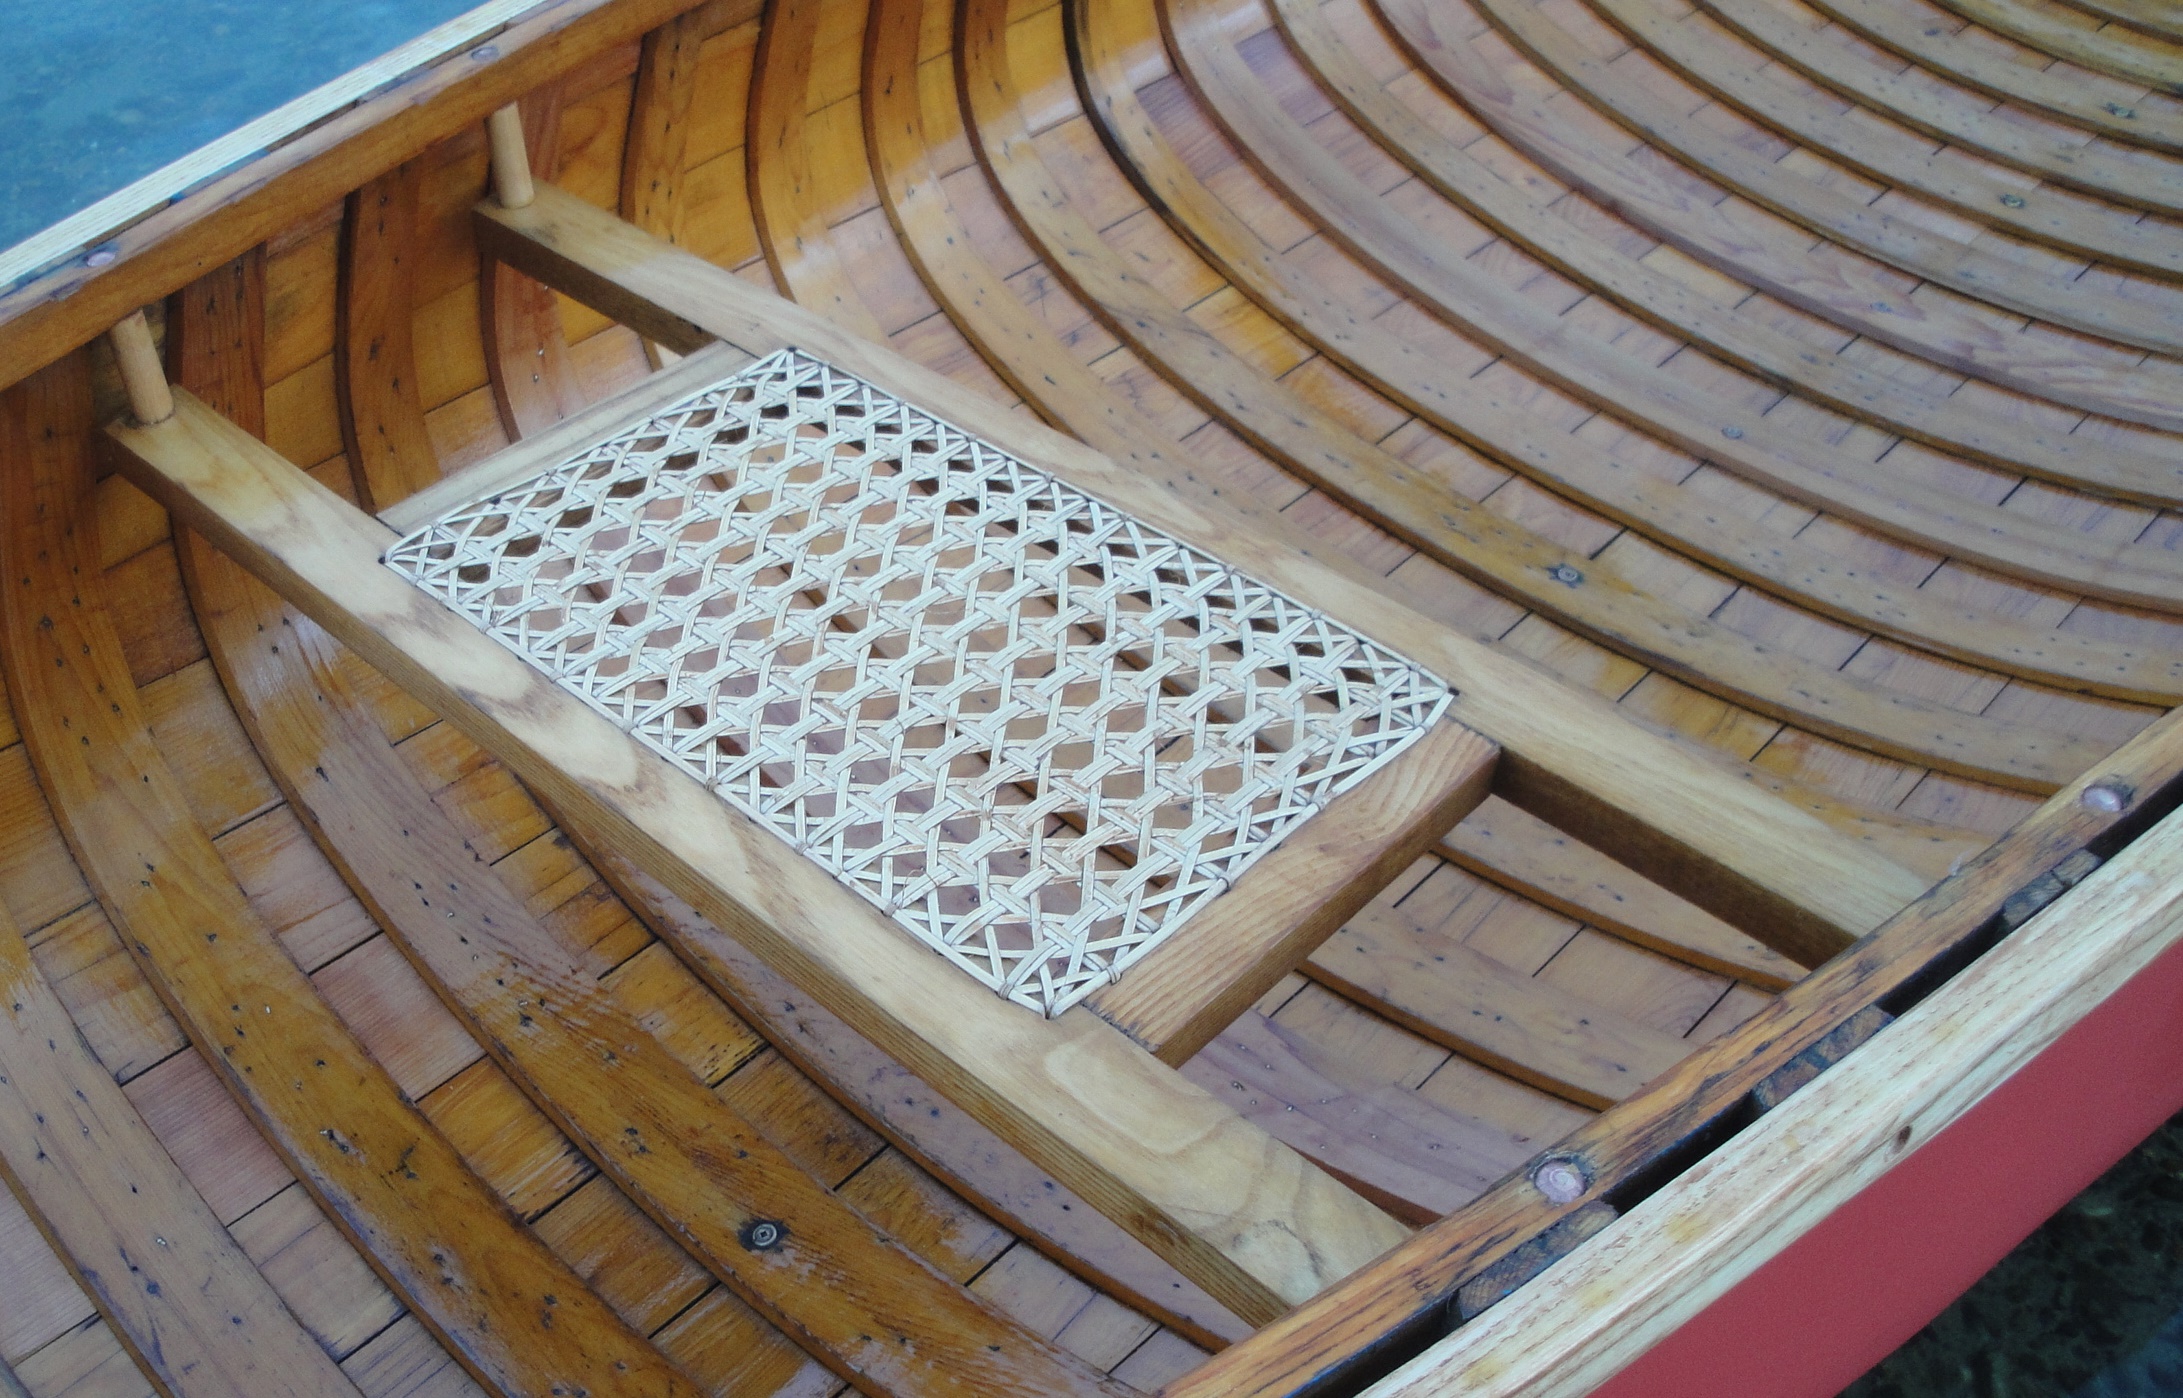
The canoe featured by Bill Mason in the film is a Chestnut Pal (16′ pleasure canoe). Its gorgeous lines, distinctive red colour and hand-woven cane seats gives the film a touch of class.

One of my favourite occupations while watching any film, is looking for and finding continuity glitches. In this one, Bill navigates his Chestnut Pal through a particular set of rapids. Meanwhile, the canoe is alternately being paddled empty and then is loaded with canoe packs — switching back and forth as if by magic.

I enjoy watching the Chestnut Pal handle challenging rapids with grace and style. For a general-purpose canoe that is 12.5″ (32 cm) deep with a 36″ (92 cm) beam, its ability to handle these conditions is impressive. That said, I like to keep in mind that Bill was able to run the same section of river many times and select the runs that worked out (the key to good story-telling is good editing).

For anyone unfamiliar with wood-canvas canoes, this film is an education in just how durable they are. I love watching Bill bumping and thumping off rocks in his Chestnut Pal. Especially impressive is one sequence where the canoe hits an exposed boulder broadside in the river and lives to tell the tale.

Bill plays fast and loose with cinematic continuity during a sequence discussing how to handle the canoe in high-water conditions. We watch him start into a class 3 rapid in his Chestnut Pal (note the hand-woven cane seat).

Then, the canoe miraculously survives a near upset. Indeed, this would have been a miracle if Bill was paddling his Chestnut Pal. However, a closer look reveals that the canoe capable of handling this situation is not a Chestnut Pal but rather a Chestnut Prospector (16′ wilderness tripping canoe) that is 14.5″ (37 cm) deep — note the all-wood slat seats.
The Chestnut Prospector is perfectly designed to handle class 3 rapids. The extra depth keeps the water out of the canoe as does the fact that the hull is flared (V-shaped) about 4′ (1.2 meters) from each end. Bill painted all of his canoes the same colour in order to allow him to interchange them during filming.

The photography in these films is absolutely stunning. The image of a red canoe on the water has become a major part of Canadian iconography due in no small part to Bill Mason and his use of red Chestnut canoes in his films.

The Chestnut Pal is one of the best general-purpose canoes ever designed. However, it is not designed to handle class 3 rapids. Apparently, that did not stop Bill Mason from trying. I applaud him for showing us the limits of this amazing canoe.

I encourage you to make your way to the NFB website and check out the Path of the Paddle films by Bill Mason. They are, for me, well worth the time and effort.
by Mike Elliott, Kettle River Canoes
email: artisan@canoeshop.ca
The blogs I do on the specifications of canoe components for various types of canvas-covered canoes seem to be quite popular. Apparently, I am the only one out there taking the time to write about this stuff and share it with others on-line. This time around, I am presenting a restorer’s guide to the Bobs Special from the Chestnut Canoe Company.
This canoe was one of two lightweight pleasure canoes built by Chestnut (the other was an 11’ solo canoe called the Featherweight that weighed about 38 pounds). Before I talk about the canoe, I’d like to clarify the name. According to Roger MacGregor in his book When the Chestnut was in Flower, Henry and William Chestnut were real history buffs. The telegraph code for the 15’ 50-Lb. Special was BOBS and made reference to Lord Roberts, a major figure during the Second Boer War in South Africa. Over the years, as this wide, light-weight canoe became more difficult to keep under the weight limit of 50 lbs. (the average weight was 58 pounds while the carrying capacity was 700 pounds), they changed the name. I have seen a variety of Chestnut catalogues call it Bob’s Special, Bob Special and Bobs Special. So, feel free to take your pick.

If you happen to have a Bobs or have been lucky enough to come across one in need of some TLC, you will notice what a sweet little canoe this is. It paddles like a dream which is surprising for a canoe that is 37” (94 cm) wide. Its bottom has a shallow-arch that reduces the waterline width when paddled with a light load. There is a fair amount of rocker in the ends which adds to its maneuverability. At the same time, it is not difficult to stand up in a Bobs – making it ideal for fly-fishing or general recreational paddling for a less experienced paddler.

One little note here: I am listing all of the dimensions in inches. I apologize to all of you who are working in metric. The canoes were built with imperial measurements originally, so I find it easier and more accurate to stick with this measurement scale.

Inwales –The inwale is a length of White Ash or Douglas Fir 15/16” high with the edge grain visible on the top surface. It is fashioned to fit the tumblehome present on most Chestnut canoes. Therefore, the top surface is 9/16” wide while the bottom width is 11/16”. The last 18” or so at each end is tapered down to about ½” wide (top and bottom) along the sides of the decks. All of the transverse components (centre thwart and seats) are attached to the inwales with 10-24 (3/16”) galvanized steel carriage bolts. I replace these with 10-24 silicon-bronze carriage bolts.

The gunwales (both inwales and outwales) are pre-bent about 18” from the ends. If you are replacing these components, the wood will have to be soaked for 3 days, heated by pouring boiling water over them and bent onto custom-built forms in order to get a proper fit.

Outwales – The outwales are also made of White Ash or Douglas Fir. Depending on when the canoe was built, the outwales may have a chamfered edge on the bottom of the outside surface. Water often gets trapped under the outwales and results in rot on the inside surface of the originals because they assembled the canoe first and then applied paint and varnish. Consequently, the inside surfaces of the outwales are bare wood. Therefore, I usually end up replacing this component. Prior to installation, I seal the wood on all surfaces with a couple of coats of spar varnish. Unlike the original builders, I do all of the painting and varnishing first and then assemble the canoe.

Decks – The decks the Bobs Special were made of hardwood – usually maple, white ash or white oak. Sometimes, they used mahogany to help reduce the overall weight. By the time you start restoring your canoe, the decks are often rotted along with the stem-tops and inwale-ends. They are attached to the inwales with six 1¾” #8 bronze wood screws. As with the outwales, I help prevent future rot by sealing the decks on all surfaces with a couple of coats of spar varnish. The deck extends about 18” into the canoe from the end.

Stem-Top – You will rarely if ever have to replace the entire stem. However, I rarely see an original stem-top that is not partially or completely rotted away. Because the top 6” or so of the stem is straight, you can usually make the repair without having to pre-bend the wood to fit the original stem-profile.

Keel – The Bob Special had a regular (tapered) keel installed. Use a piece of hardwood (the original was ash) and taper each end to 3/8” wide. The overall length is about 13’. It will accept the brass stem-band which is 3/8” wide.

Ribs – The Bobs Special was constructed with so-called “regular” ribs (2-3/8” wide) that were ¼” thick instead of the normal 3/8”. They create a light-weight canoe but are not as robust as the regular ribs. You will probably encounter several broken ribs in your canoe restoration.
The edges of the ribs are chamfered in most Bobs Specials. Replicate the angles found in your canoe. Often, the edge closest to the centre of the canoe has tapered ends (11° chamfer) while the edge closest to one end of the canoe is chamfered about 25°.

Planking – The planking in Chestnut Canoes was made of either Eastern White Cedar or Western Red Cedar. Although the planks started out at 5/32” thick, you will probably be shaving replacement planks down to match the original planks. Again, this results in a lighter, less robust canoe. You will probably encounter many broken planks in your canoe.
Seats – The seat frames are made of ¾” ash, oak or maple that is 1½” wide. Both seats are suspended under the inwales with 10-24 carriage bolts and held in position with 5/8” hardwood dowel. The rear stern seat dowels are 1¾” long while the front dowels are ¾” long. All of the bow seat dowels are ¾” long. The forward edge of the bow seat is about 51½” from the bow-end of the canoe while the forward edge of the stern seat is about 39½” from the stern-end of the canoe.

Centre Thwart – The thwart is made of ¾” ash that is 2½” wide. It tapers from the centre to create handle grips on either side that are 2” wide. They were attached directly under the inwales with galvanized steel 10-24 carriage bolts. As with every component in the canoe, I seal the entire thwart with a couple of coats of spar varnish prior to installation and replace the original galvanized steel bolts with silicon bronze bolts.
All of this (and much more) is described in my book – This Old Canoe: How To Restore Your Wood Canvas Canoe.
If you live in Canada, CLICK HERE to buy the book.
If you live in the USA, CLICK HERE to buy the book.
If you live in the UK, CLICK HERE to buy the book.
Si vous habitez en France, CLIQUEZ ICI acheter le livre.

