How to Repair Rotted Rib-tops in Wood-Canvas Canoes
March 25, 2018
by Mike Elliott, Kettle River Canoes
email: artisan@canoeshop.ca
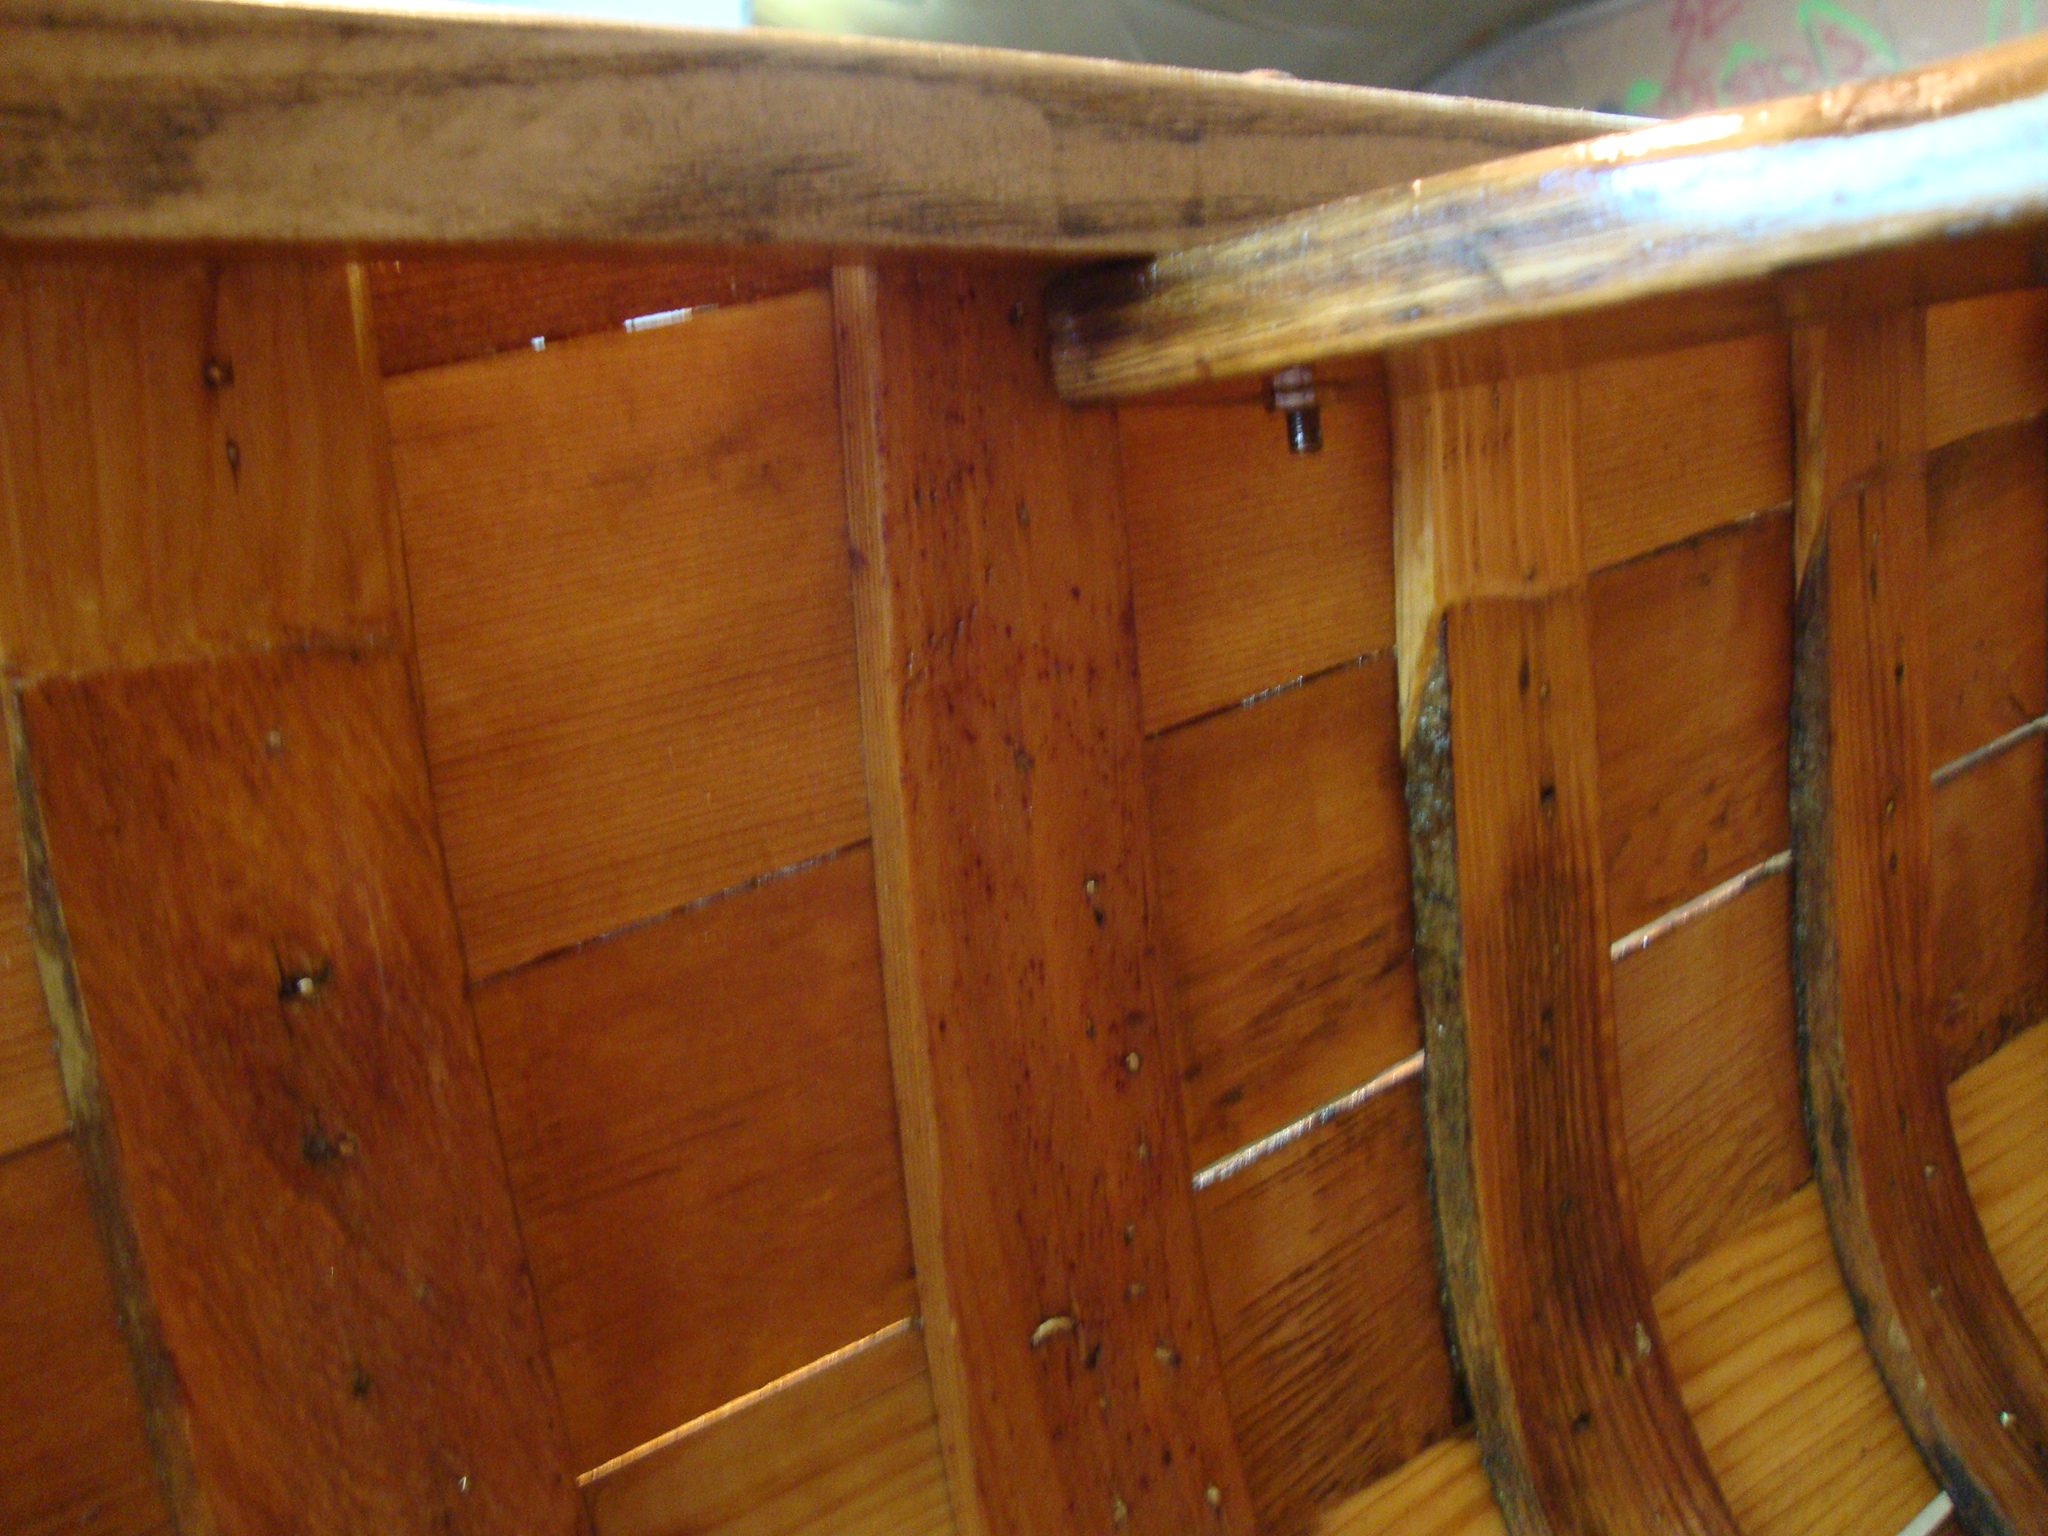
While repairing your wood-canvas canoe, you may come across some ribs that are perfectly good except for a small portion attached to the inwale. Rather than replacing the ribs, it is possible to repair the rib-tops.

First of all, you need access to a substantial portion of the damaged ribs in order to do the repair. Remove the planking along the sheer line to expose all of the damaged rib-tops. Identify each piece of planking as it comes off since you may be able to replace the original pieces once the repairs are completed.

Now, machine new cedar to replace the damaged rib-tops. Sometimes the rib-tops are tapered, so make sure each replacement piece is cut and shaped to match the original wood.

Cut the rotted top off the rib to be repaired. I use a Japanese utility saw with 14 teeth per inch.

Create a scarf angle in the original rib. For a solid scarf joint, the glued surface ought to be at least six times that of the rib thickness. Therefore, ribs 3/8” thick have a scarf angle with a surface area approximately 2¼” long. You can use a rasp to make the scarf. I use a 4” angle grinder that is set up with a 24-grit sandpaper disc. It makes quick work of the job – perhaps too quick, so careful attention and a light touch are needed.

Line up the new wood with the original rib and mark the location of the matching scarf.

Create the matching scarf in the new cedar.

Glue the new wood to the original rib and clamp it in place with spring clamps. I use either a water-proof resorcinol glue (such as Weldwood or Dural) or a polyurethane glue (such as Gorilla Glue). The resorcinol glues are water-based which makes clean-up a breeze. After clamping the new piece in place, wipe away any excess glue with a damp rag. When dry, it sands easily and blends well with the wood. Polyurethane glue sets more quickly, sands easily once cured and creates a very strong bond. Paint Thinner (mineral spirits) is used to clean up polyurethane glues. I use these two glues interchangeably.

The repaired rib-top is fairly rough at first.

However, a quick sanding evens out the joint and creates a clean repair.

Attach the rib-top to the inwale (I use 7/8” 14-gauge bronze ring nails, copper canoe nails or brass canoe tacks) and trim the rib-top flush with the top edge of the inwale.

When faced with rib-top repairs next to each other, it is easiest to do every second rib-top to avoid clamping difficulties. Therefore, it takes a couple of days to complete all of the repairs.

If most of the rib-tops in your canoe are rotted, it is still possible to repair the ribs rather than replace every rib in the canoe. Since every rib will be cut, the original sheer-line will be lost. Therefore, the first step is to establish a reference line for the sheer-line. Go around the canoe with a carpenter’s pencil and mark a position 5” below the top of each rib. Where the entire top of the rib has rotted away, skip to the next rib and mark the reference point there. This will give you enough reference points to create a fair line the full length of the canoe. Now, tack a spruce batten (approximately ¼” x ¾” x 16’) at the reference points to create a fair reference line.

As mentioned before, every second rib will be repaired. Unless you have hundreds of 3” spring clamps, it will take a week or two to splice new wood into every rib. Once done, mark each new rib-top 5” above the reference line and cut every rib to re-create the original sheer-line of the canoe.
Reattach the original planking and replace damaged planking with new cedar. Stain the new wood to match wood in the rest of the canoe.

The finished product is strong and solid. Many of the rib-tops repairs extend less than an inch below the inwales, so it was difficult to realize that they had been replaced.

All of this (and much more) is described in my book – This Old Canoe: How To Restore Your Wood Canvas Canoe.
If you live in Canada, CLICK HERE to buy the book.
If you live in the USA, CLICK HERE to buy the book.
If you live in the UK, CLICK HERE to buy the book.
Si vous habitez en France, CLIQUEZ ICI acheter le livre.
Bill Greenwood and his Wood-Canvas Canoes
March 18, 2018
by Mike Elliott, Kettle River Canoes
email: artisan@canoeshop.ca

Unless you live in British Columbia, you have probably never heard of Bill Greenwood or Greenwood canoes. And if you want to start a fight amongst wood-canvas canoe enthusiasts, just ask them to name the prettiest canoes ever made. In Maine, you would hear names like Morris, Gerrish and White. In Ontario, Peterborough canoes are top of the list. But in British Columbia, people speak about Greenwood canoes in hushed tones and bow down to Bill Greenwood’s exquisite water craft.

There is some information available about Bill or his canoes. There is a website devoted to Bill, his company and his family. Checkout greenwoodcanoecompany.com
The information presented here has been collected from people who bought their canoes directly from the builder at his shop as well as some anecdotes from Jim Kinzell, who worked with Bill as an apprentice from 1969 to 1975. Dave Lanthier from Kamloops gave me a small biography produced in 1972 as an assignment for a physical education course at a college. My information is incomplete. That said, Bill Greenwood and Greenwood Canoes deserve recognition in the world of wood-canvas canoes.

As I understand it, Bill was born in 1912 and was an active outdoorsman who loved hiking, skiing, canoeing — just about anything that got him outside. Then, he suffered a stroke while hiking in the mountains. He was 24 years old. As part of his rehabilitation, Bill decided to learn how to build canoes. He boarded a train in Vancouver, BC and made his way to Old Town, Maine. He hung around the Old Town Canoe Company shop and absorbed everything he could about canoe building until they realized what he was doing and kicked “the spy” out. Bill spent some time at other canoe factories including the Peterborough Canoe Company in Ontario before returning to British Columbia and setting up Greenwood Water Craft Company. The shop location changed a number of times over the years until he established a large shop complex on Mitchell Island in Richmond, BC in the late 1960′s.

Not surprisingly, the lines and details of Greenwood Canoes borrow heavily from the “Maine Guide” canoes of Old Town and other builders in Maine. They all sport wide, flat bottoms and have very little rocker. The stem profile is heavily curved (often forming a complete half-circle) and the hulls all contain a lot of tumblehome. Bill’s 16’ (4.9 meter) canoes did not have a centre thwart, but instead had both bow- and stern-quarter thwarts as was typical of Maine Guide canoes. Many of the canoes had bottoms reinforced with half-ribs between the main ribs to create a strong comfortable floor. And Bill absolutely refused to make a canoe without a keel. In fact, one of my clients asked Bill to leave the keel off the canoe he was ordering. Apparently, Bill said something like, “My canoes have keels.” When my client told Bill that many Chestnut Canoes paddled very well without a keel, Bill said, “If you want a Chestnut canoe, then buy a Chestnut canoe.” My client told me that story while I was preparing the restoration work order on his 17’ (5.2 meter) Chestnut Cruiser.

The workmanship in Greenwood canoes is outstanding. He used “aircraft quality” Sitka Spruce for the double-tapered ribs. The 4″ (10 cm) wide planking was made of air-dried, quarter sawn (edge grain) old-growth Western Red Cedar. Following the tradition at Old Town canoes, the planking is perfectly tight with absolutely no gaps. The stems (and slat seats) were White Oak while the rest of the canoe was trimmed in Philippine Mahogany (Luan). All of the woodwork was flawless – graceful lines and elegant detailing. The one drawback in many Greenwood canoes built in the early 1970’s is the fact that he used steel screws to attach the mahogany outwales. Apparently, Bill was feuding with one of his suppliers. He wanted 1.5” (37 mm) #8 brass wood screws in lots of 1,000 while the supplier insisted on selling lots of 10,000. Bill ordered steel screws from another supplier in lots of 1,000. I have had to cut that beautiful mahogany into hundreds of tiny pieces because the steel screws had corroded to the point of being fused into the wood. I’m sure Bill thought he had won the war with his supplier, but it has made the restorer’s job much more difficult 40 years later.

The quality of the workmanship is all the more impressive when you consider the fact that Bill worked almost entirely with one hand. The stroke affected his left side. Consequently, his left hand was crippled to the point that he had limited use of it. His daughter, Susan, told me that Bill referred to his left hand as “Duddy” – his dub of a left hand. My understanding is that he used jigs for almost every step of production. That and a few very good assistants in the shop (including George Fletcher and Jim Kinzell) made it all work beautifully.

Greenwood Canoes came in lengths from 15’ (4.6 meter) to 18’ (5.5 meter). He had two basic models – the Pleasure Model (12” – 30 cm – deep) and the large volume Prospector Model (14” – 36 cm – deep). He built a full range of lengths in both models (as well as a 12′ car-top boat) until 1970. One client of mine has a beautiful home in North Vancouver overlooking the entire Lower Mainland. He had ordered a canoe from Bill in 1970 and was expecting a call any day to say that the canoe was ready. Then, he heard a news report of a large fire on Mitchell Island in Richmond. He looked out over the valley from his home and saw a big cloud of smoke. The Greenwood Water Craft shop was engulfed in flames. The next day, my client went to the site and saw Bill kicking through the ashes that used to be his shop. He said, “I only had time to grab two canoes. The yellow one over there — that’s yours.”

Bill rebuilt the business with a limited number of moulds and continued building canoes until he sold the business in 1975. According to Doug Ingram of Red River Canoe and Paddle, the moulds ended up in Cranberry Portage (a small community in Northern Manitoba east of Flin Flon). Apparently, they were never used again and are now in very poor condition. Bill died in 1979. His contribution to the world of wood-canvas canoes is significant here in British Columbia. People bow their heads in reverence to these stunning works of art.
All of this (and much more) is described in my book – This Old Canoe: How To Restore Your Wood Canvas Canoe.
If you live in Canada, CLICK HERE to buy the book.
If you live in the USA, CLICK HERE to buy the book.
If you live in the UK, CLICK HERE to buy the book.
Si vous habitez en France, CLIQUEZ ICI acheter le livre.
How to Make and Install Half-Ribs in a Wood-Canvas Canoe
March 11, 2018
by Mike Elliott, Kettle River Canoes
email: artisan@canoeshop.ca

photo from “Tales from Misery Ridge: One Man’s Adventures in the Great Outdoors” by Paul J. Fournier. (Island Port Press, 2011)
About 130 years ago, fishing guides on the east coast of North America (most notably in Maine, New Brunswick and Quebec) started building wood-canvas canoes that they could use in order to take their clients up and down the shallow, rapid salmon rivers in the region. They used the local birch bark canoes as templates. The guides would be standing up all day in the canoe as they poled it upstream and down or held the canoe in place while the client fished for salmon. The canoes needed to be stable and rugged with a strong, comfortable floor. They designed canoes that had wide, flat bottoms which made them stable with a very shallow draft. To strengthen the hull against the inevitable encounters with rocks, they did one of two things:

a) Build the canoe with lots of ribs spaced very close together (0.5″ to 0.75″ – 13 mm to 19 mm apart).

b) Space the ribs normally (1.5″ to 2.0″ – 38 mm to 50 mm apart) and insert extra ribs between them that extended across the bottom of the canoe. These “half-ribs” created a strong, comfortable floor in the canoe.
At my canoe restoration shop, a client sometimes asks me to insert half ribs into their canoe in order to create a stronger bottom. Unfortunately, if you simply pressed shorter ribs into the bottom of the canoe between the regular ribs, the hull would become misshapen – especially if the bottom was not entirely flat. Therefore, retro-fitting half-ribs into a wood canvas canoe is done in the following way. Note, that this is done while the old canvas is off – before a new canvas is stretched on.

1) Cut and shape the new rib material from clear, straight-grained cedar. The half-ribs are about 1″ (25 mm) wide and the same thickness as the original ribs in the canoe. The sides of the half-ribs are chamfered about 10°. Sand the top edges lightly to round them off a little. Soak the new half-ribs for 48 to 72 hours. Then, steam them for about 50 to 60 minutes and bend them over the outside of the hull between the regular ribs. Allow the new ribs to dry for at least 48 hours. Just as when creating an exact replica for a broken rib in the canoe, the half-ribs are bent in a location so that the shape of the rib on the outside of the hull is the same as the dimensions required on the inside. The taper of the hull is such that the inside dimensions are achieved by bending the rib one station closer to the near-end of the canoe. Precision is not as critical for half-ribs as would normally be required since the ribs will not be curving around the chine of the canoe. Use a pencil to mark the centre-line on each new rib.

2) Remove the new ribs from the outside of the canoe and place them in the required positions between the regular ribs. Make sure the centre-line on each new rib is lined up with the centre-line of the canoe. Hold the new ribs in place with spring clamps on the inwales.

3) The length of each half-rib will vary so that they match the taper of the hull dimensions. The actual length of each rib is entirely up to you. Use a straight-edge to help determine the length of each rib and use a pencil to mark both ends.

4) One at a time, cut each half-rib to length.

5) Use a random-orbital sander and 80-grit paper to chamfer the ends of the rib.

6) Place the half-rib back into the desired location and secure it with one tack about halfway between the centre-line and one end of the rib. Make sure the rib is centered between two original ribs. Repeat this procedure on the other side of the rib making sure that the half-rib is centered between the original ribs. This can be done by one person, but is much easier when one person holds the half-rib and clinching iron while a second person drives the tacks with a cobbler’s hammer.
7) Once the half-rib is centered and straight, secure it with a full complement of tacks.

8) Repeat steps 4 to 7 for each half-rib in turn.
The entire canoe restoration process is described in my book – This Old Canoe: How To Restore Your Wood Canvas Canoe.
If you live in Canada, CLICK HERE to buy the book.
If you live in the USA, CLICK HERE to buy the book.
If you live in the UK, CLICK HERE to buy the book.
Si vous habitez en France, CLIQUEZ ICI acheter le livre.
If you have read the book, please post a review on Amazon and/or Goodreads and/or any other review site.

